Tutorial 2: Moving the Robot (MoveIt 2 + RViz)
In this tutorial we will make the real robot move using MoveIt 2 and RViz. Follow each step carefully, from this point on, we are working with real hardware.
Hardware Setup
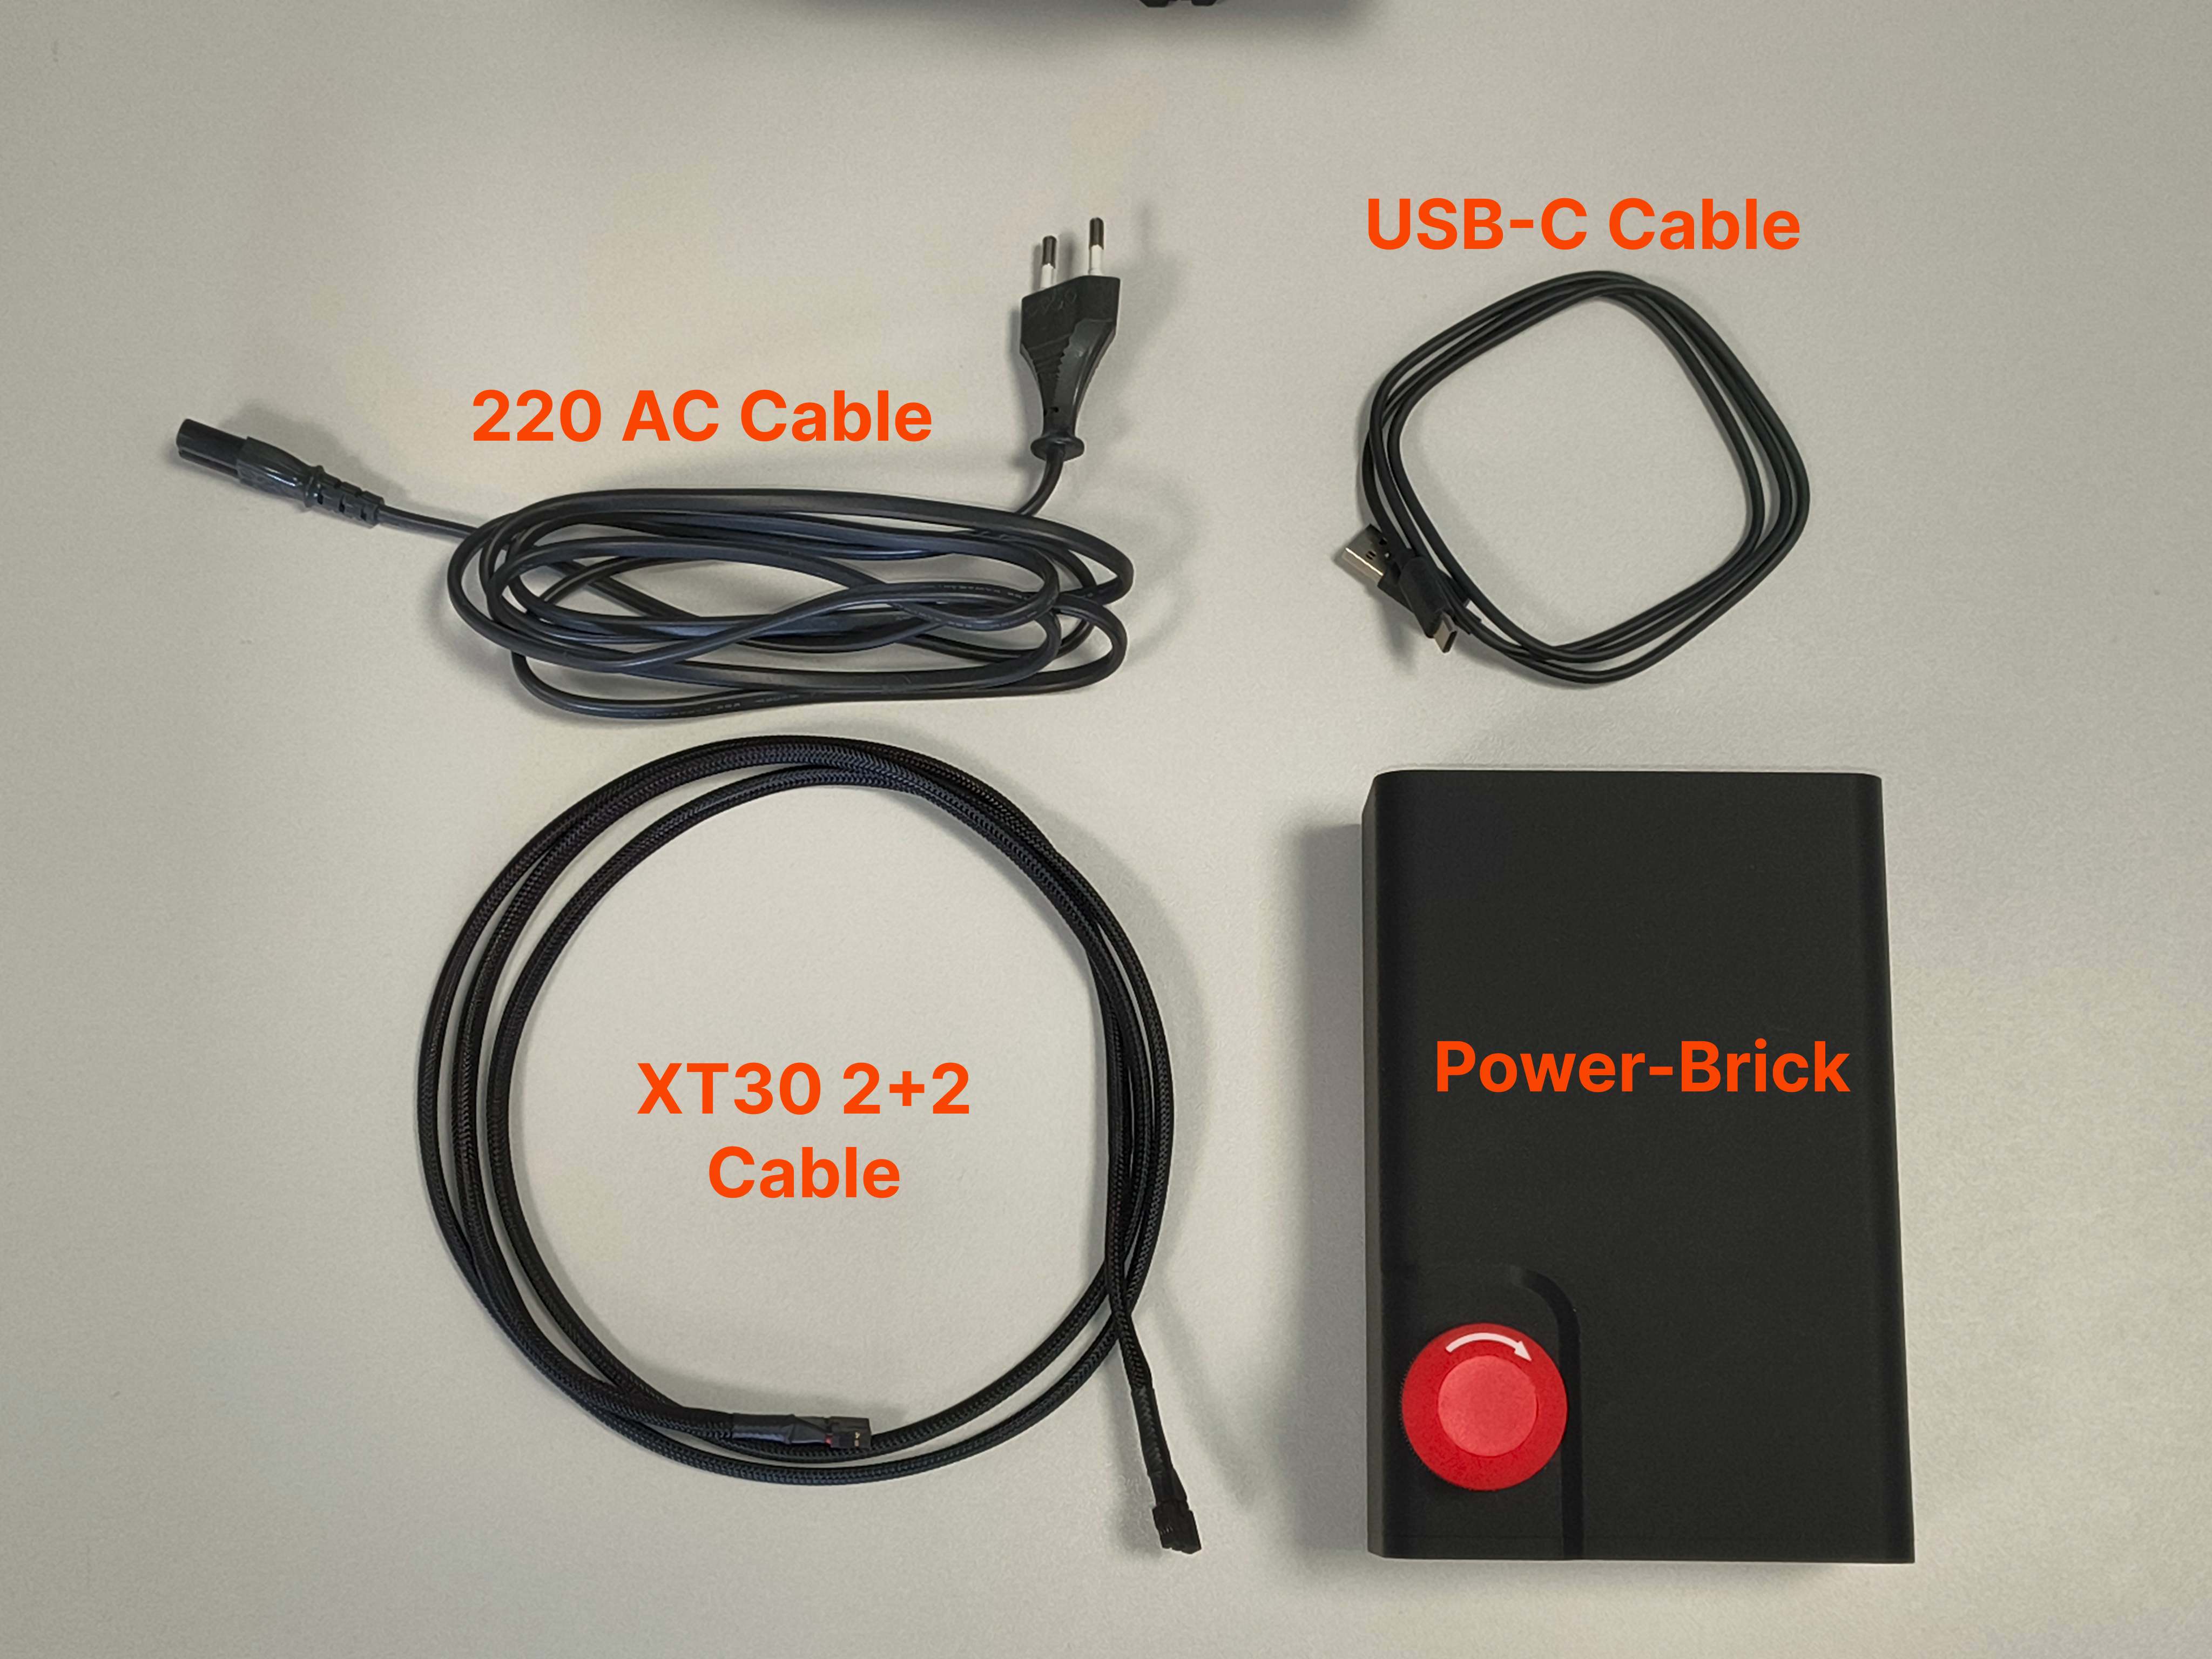
The Ulixarm-Research-Kit includes
- 220 AC Cable
- USB-C Cable
- XT30 2+2 Cable
- Power-Brick
1. Mount the Robot
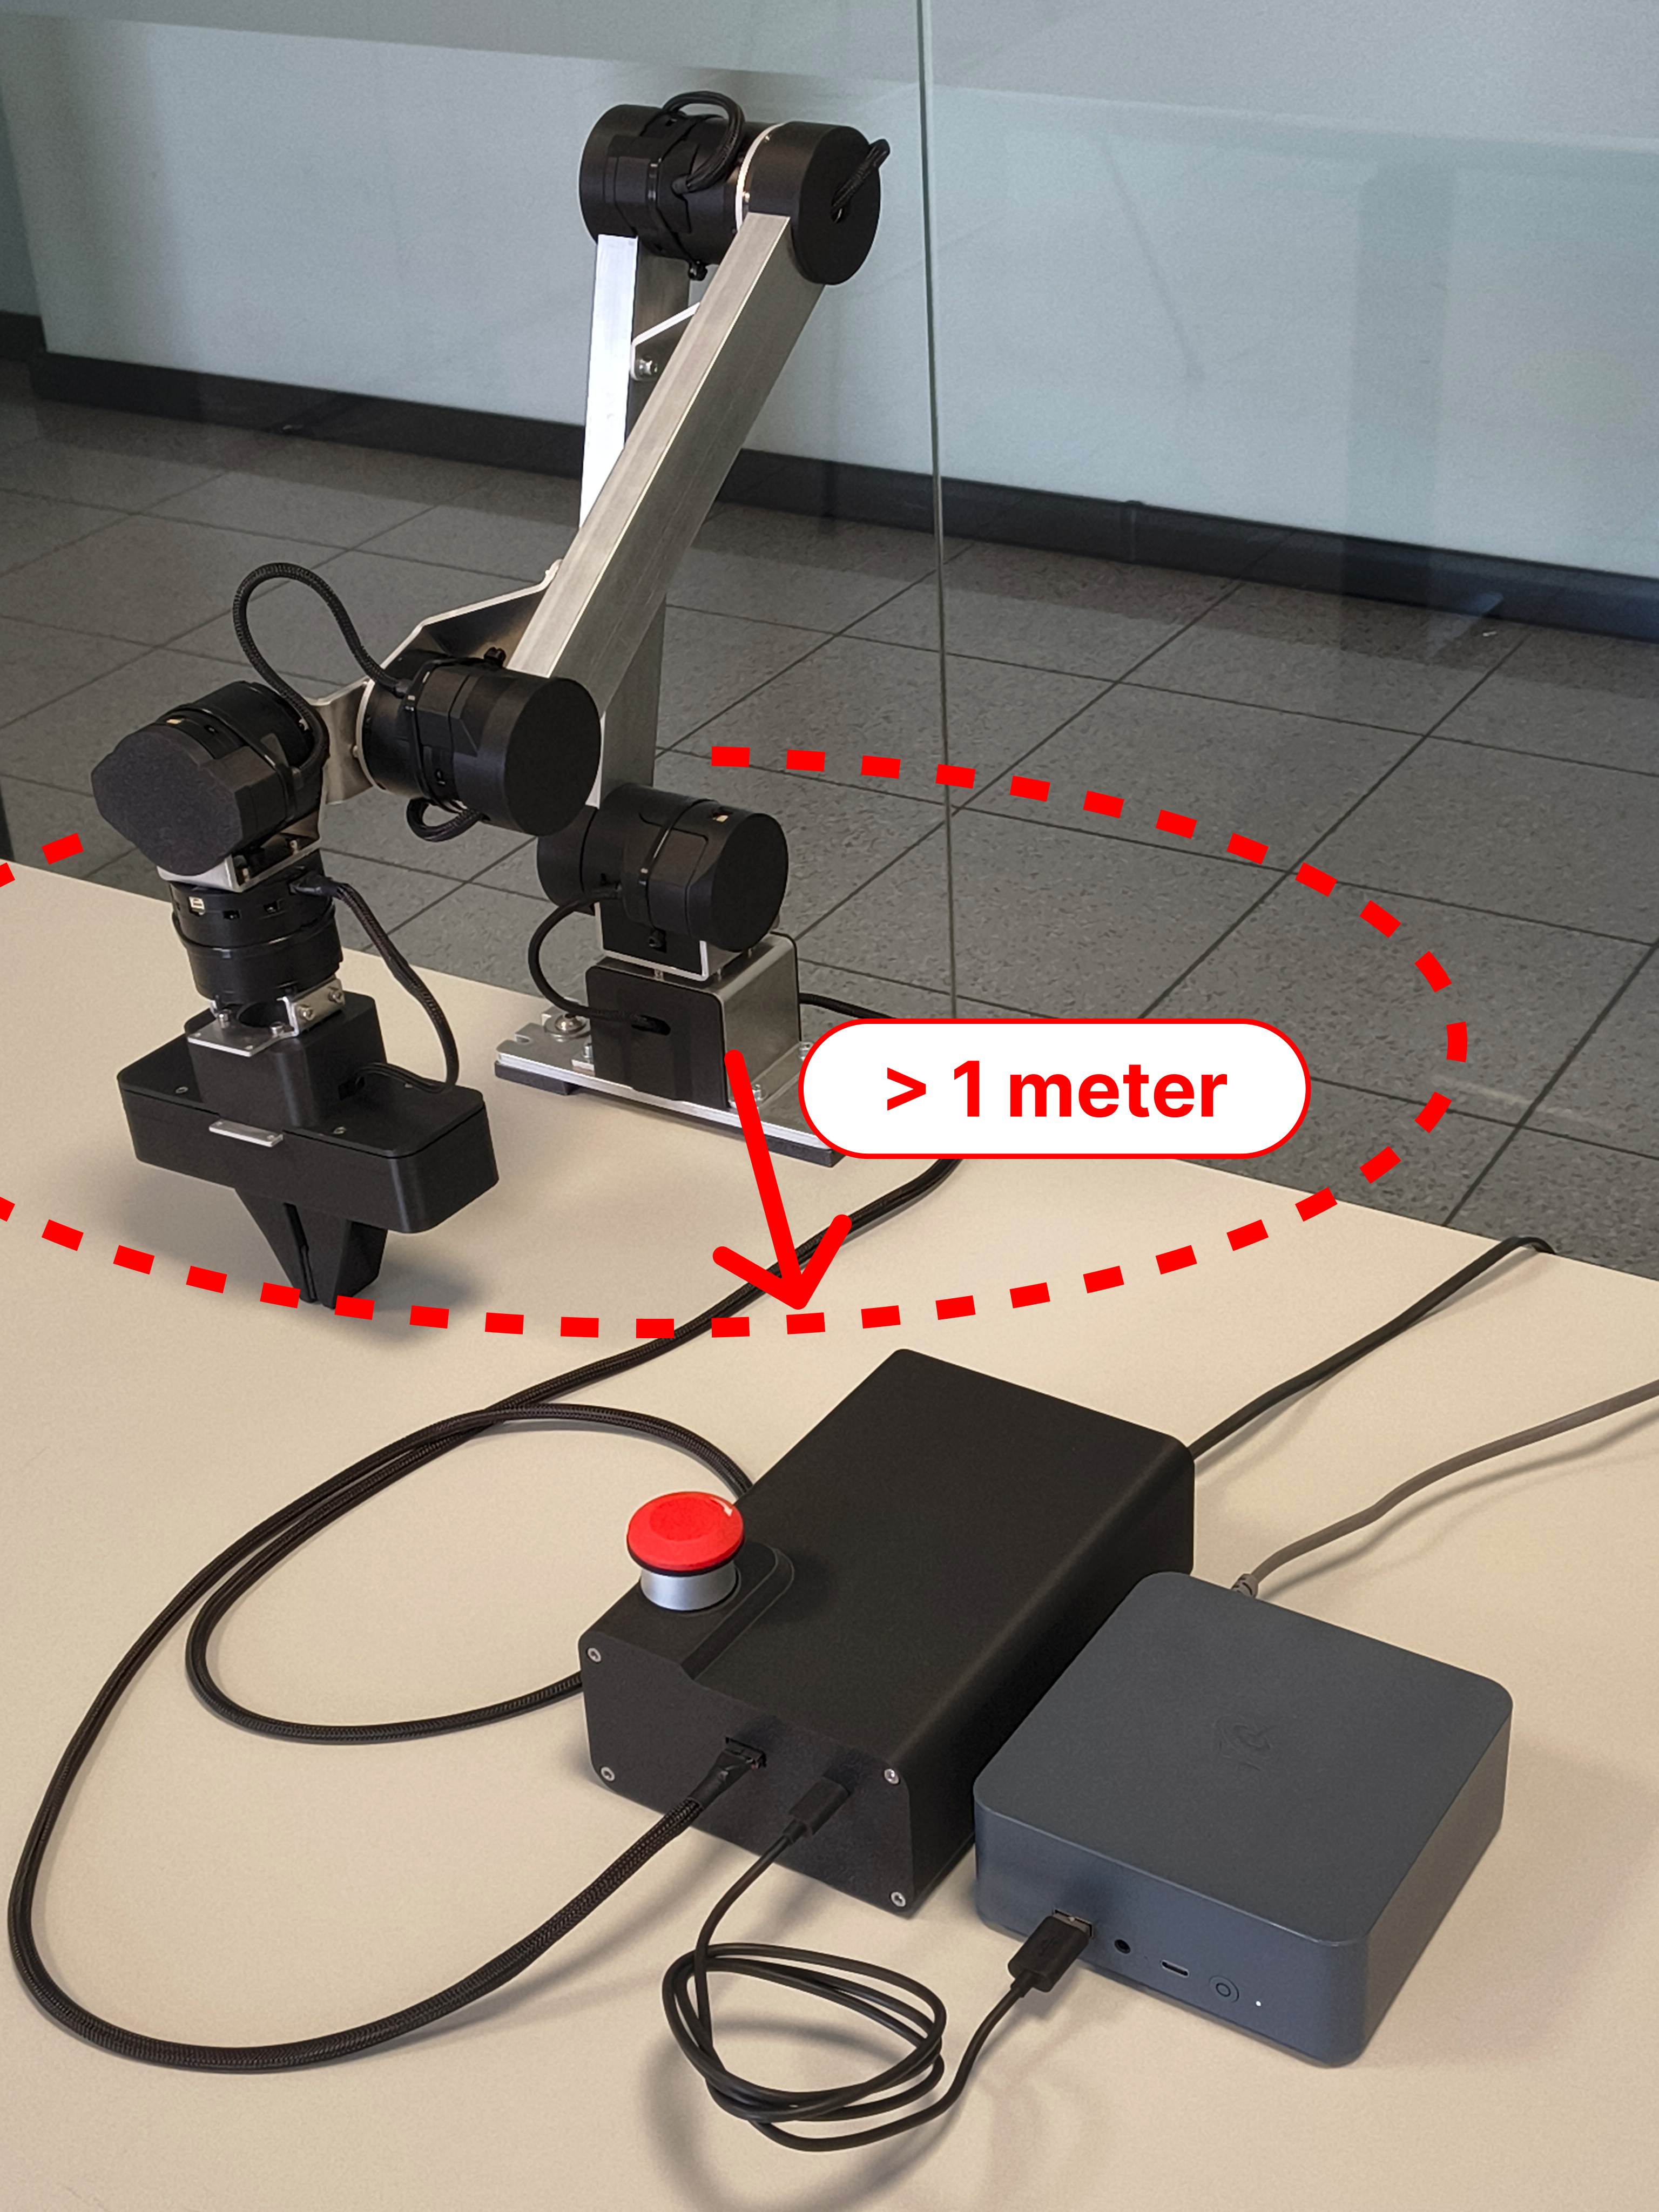
Securely fix the robot to a table in the position shown in the picture below.
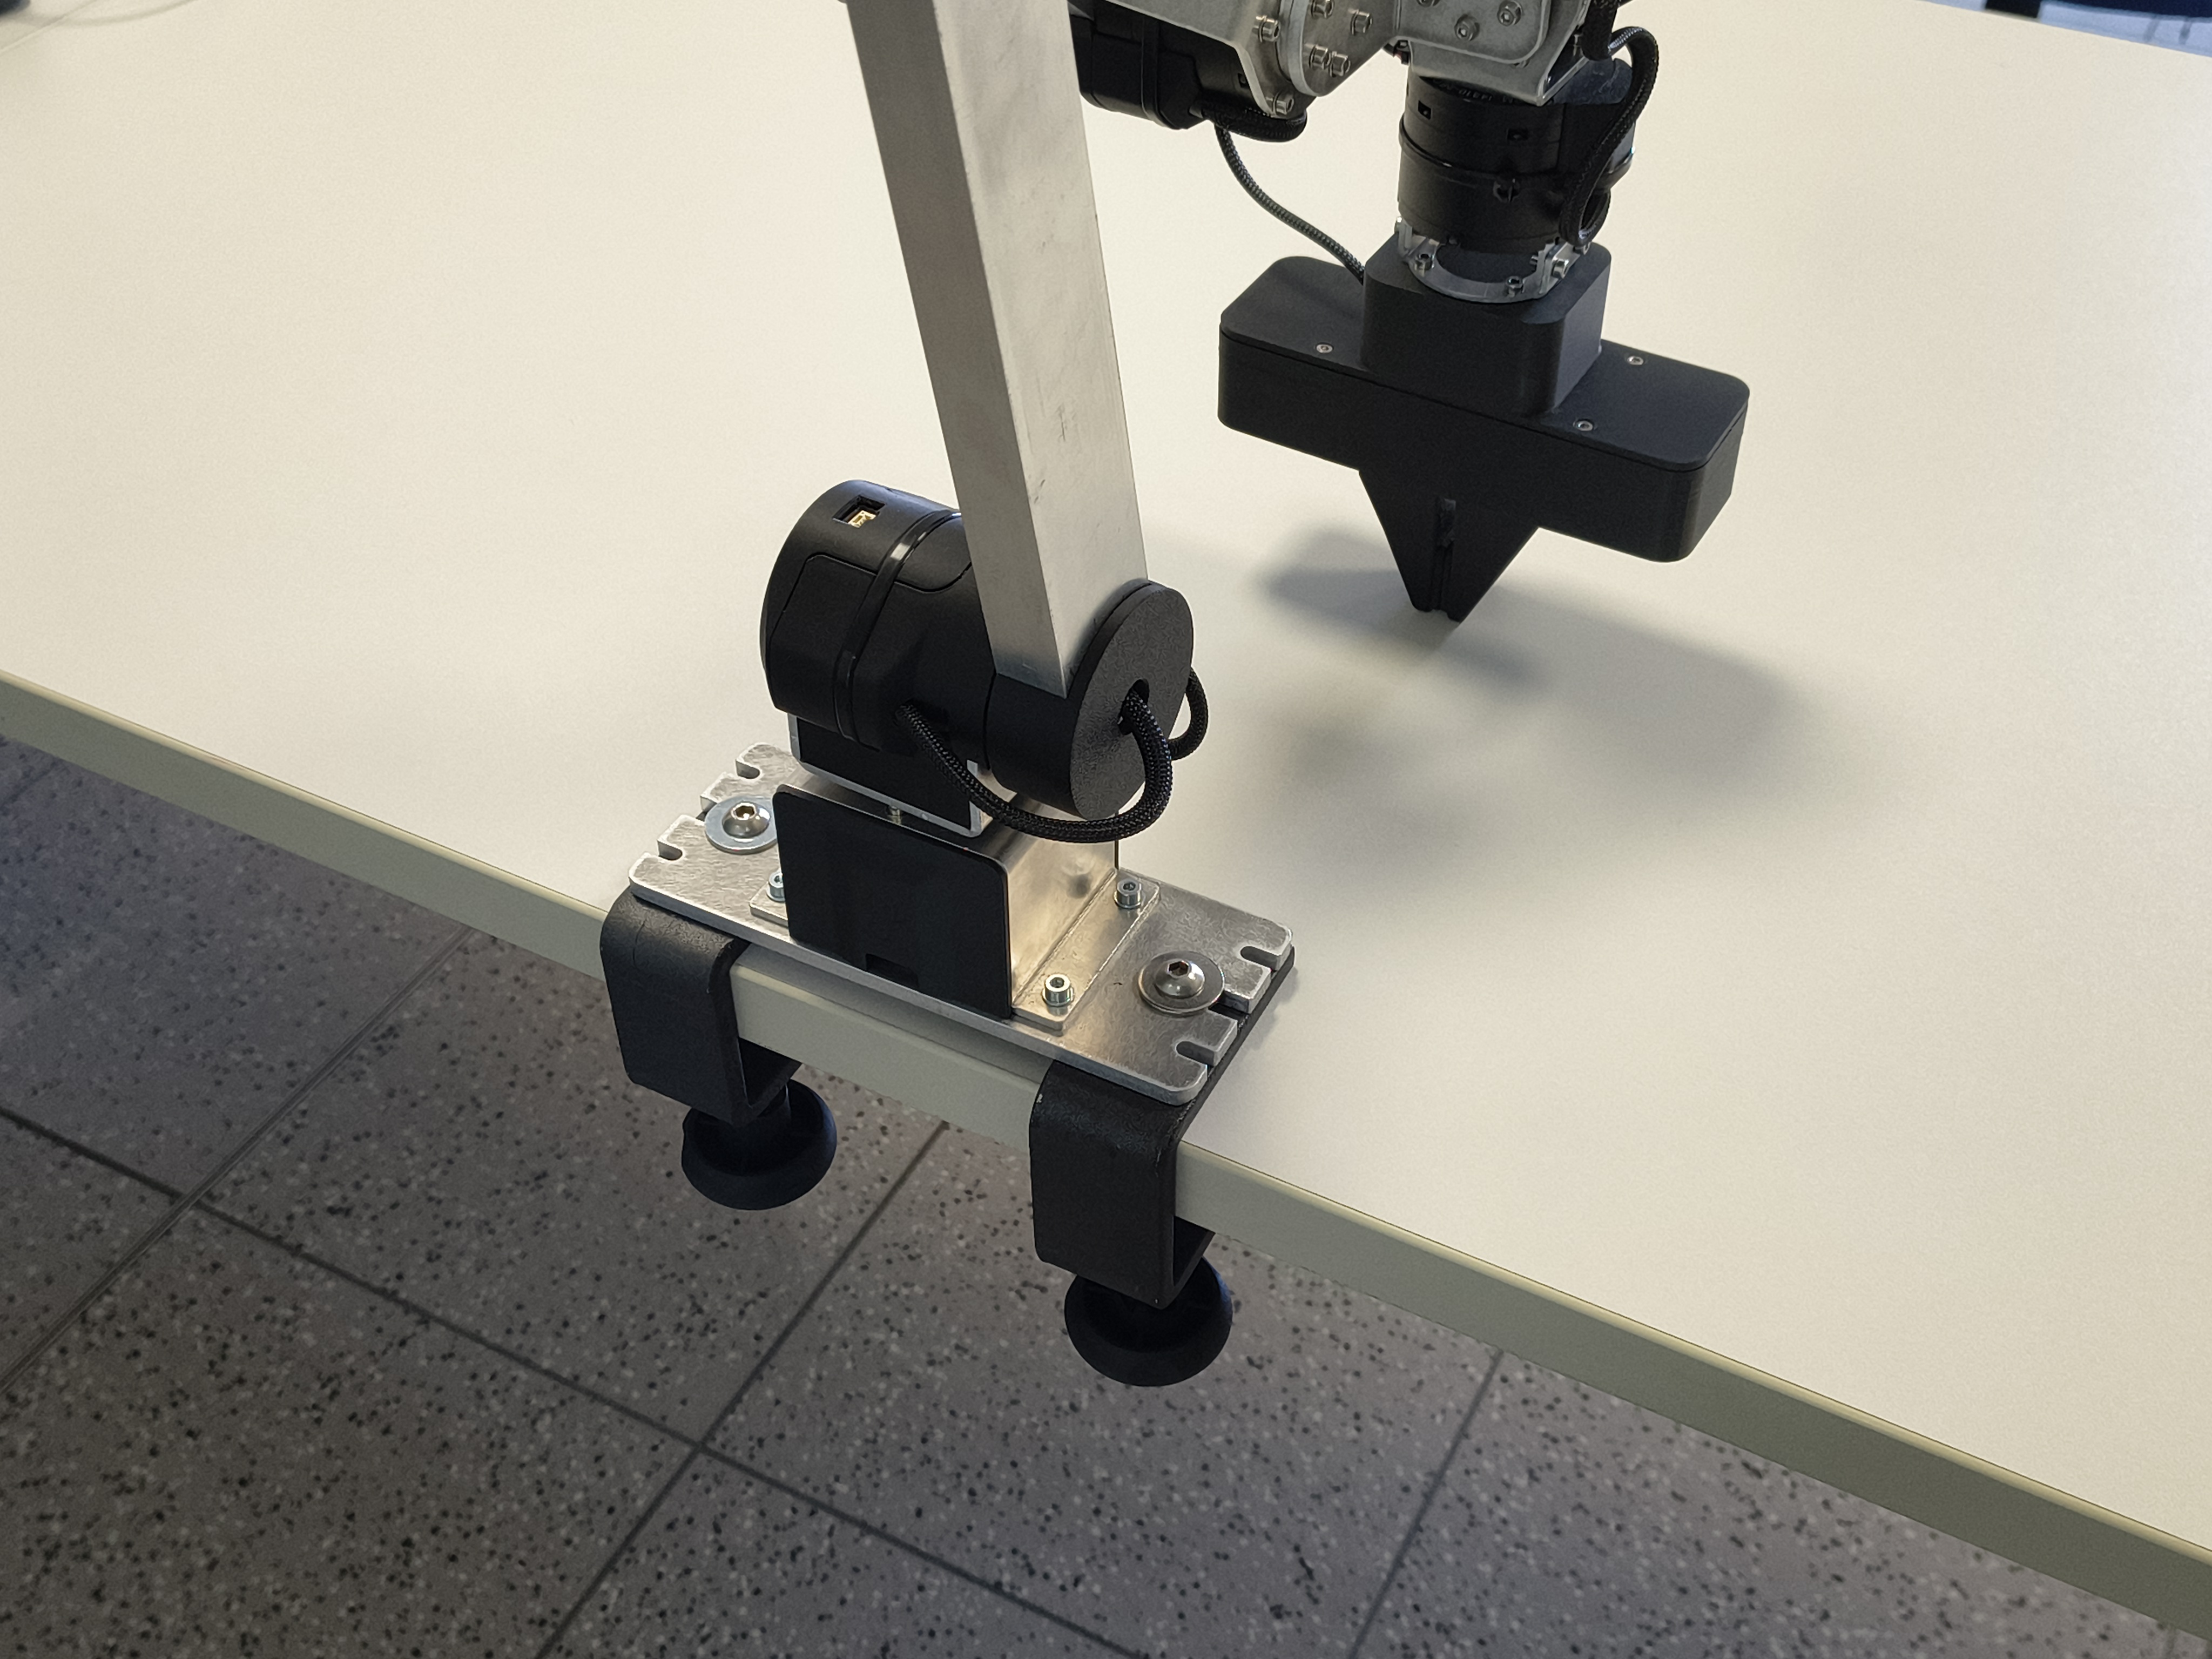
The robot must be fixed at least 1.0 meter away from people and objects at all times. Never operate the robot in an unsecured environment.
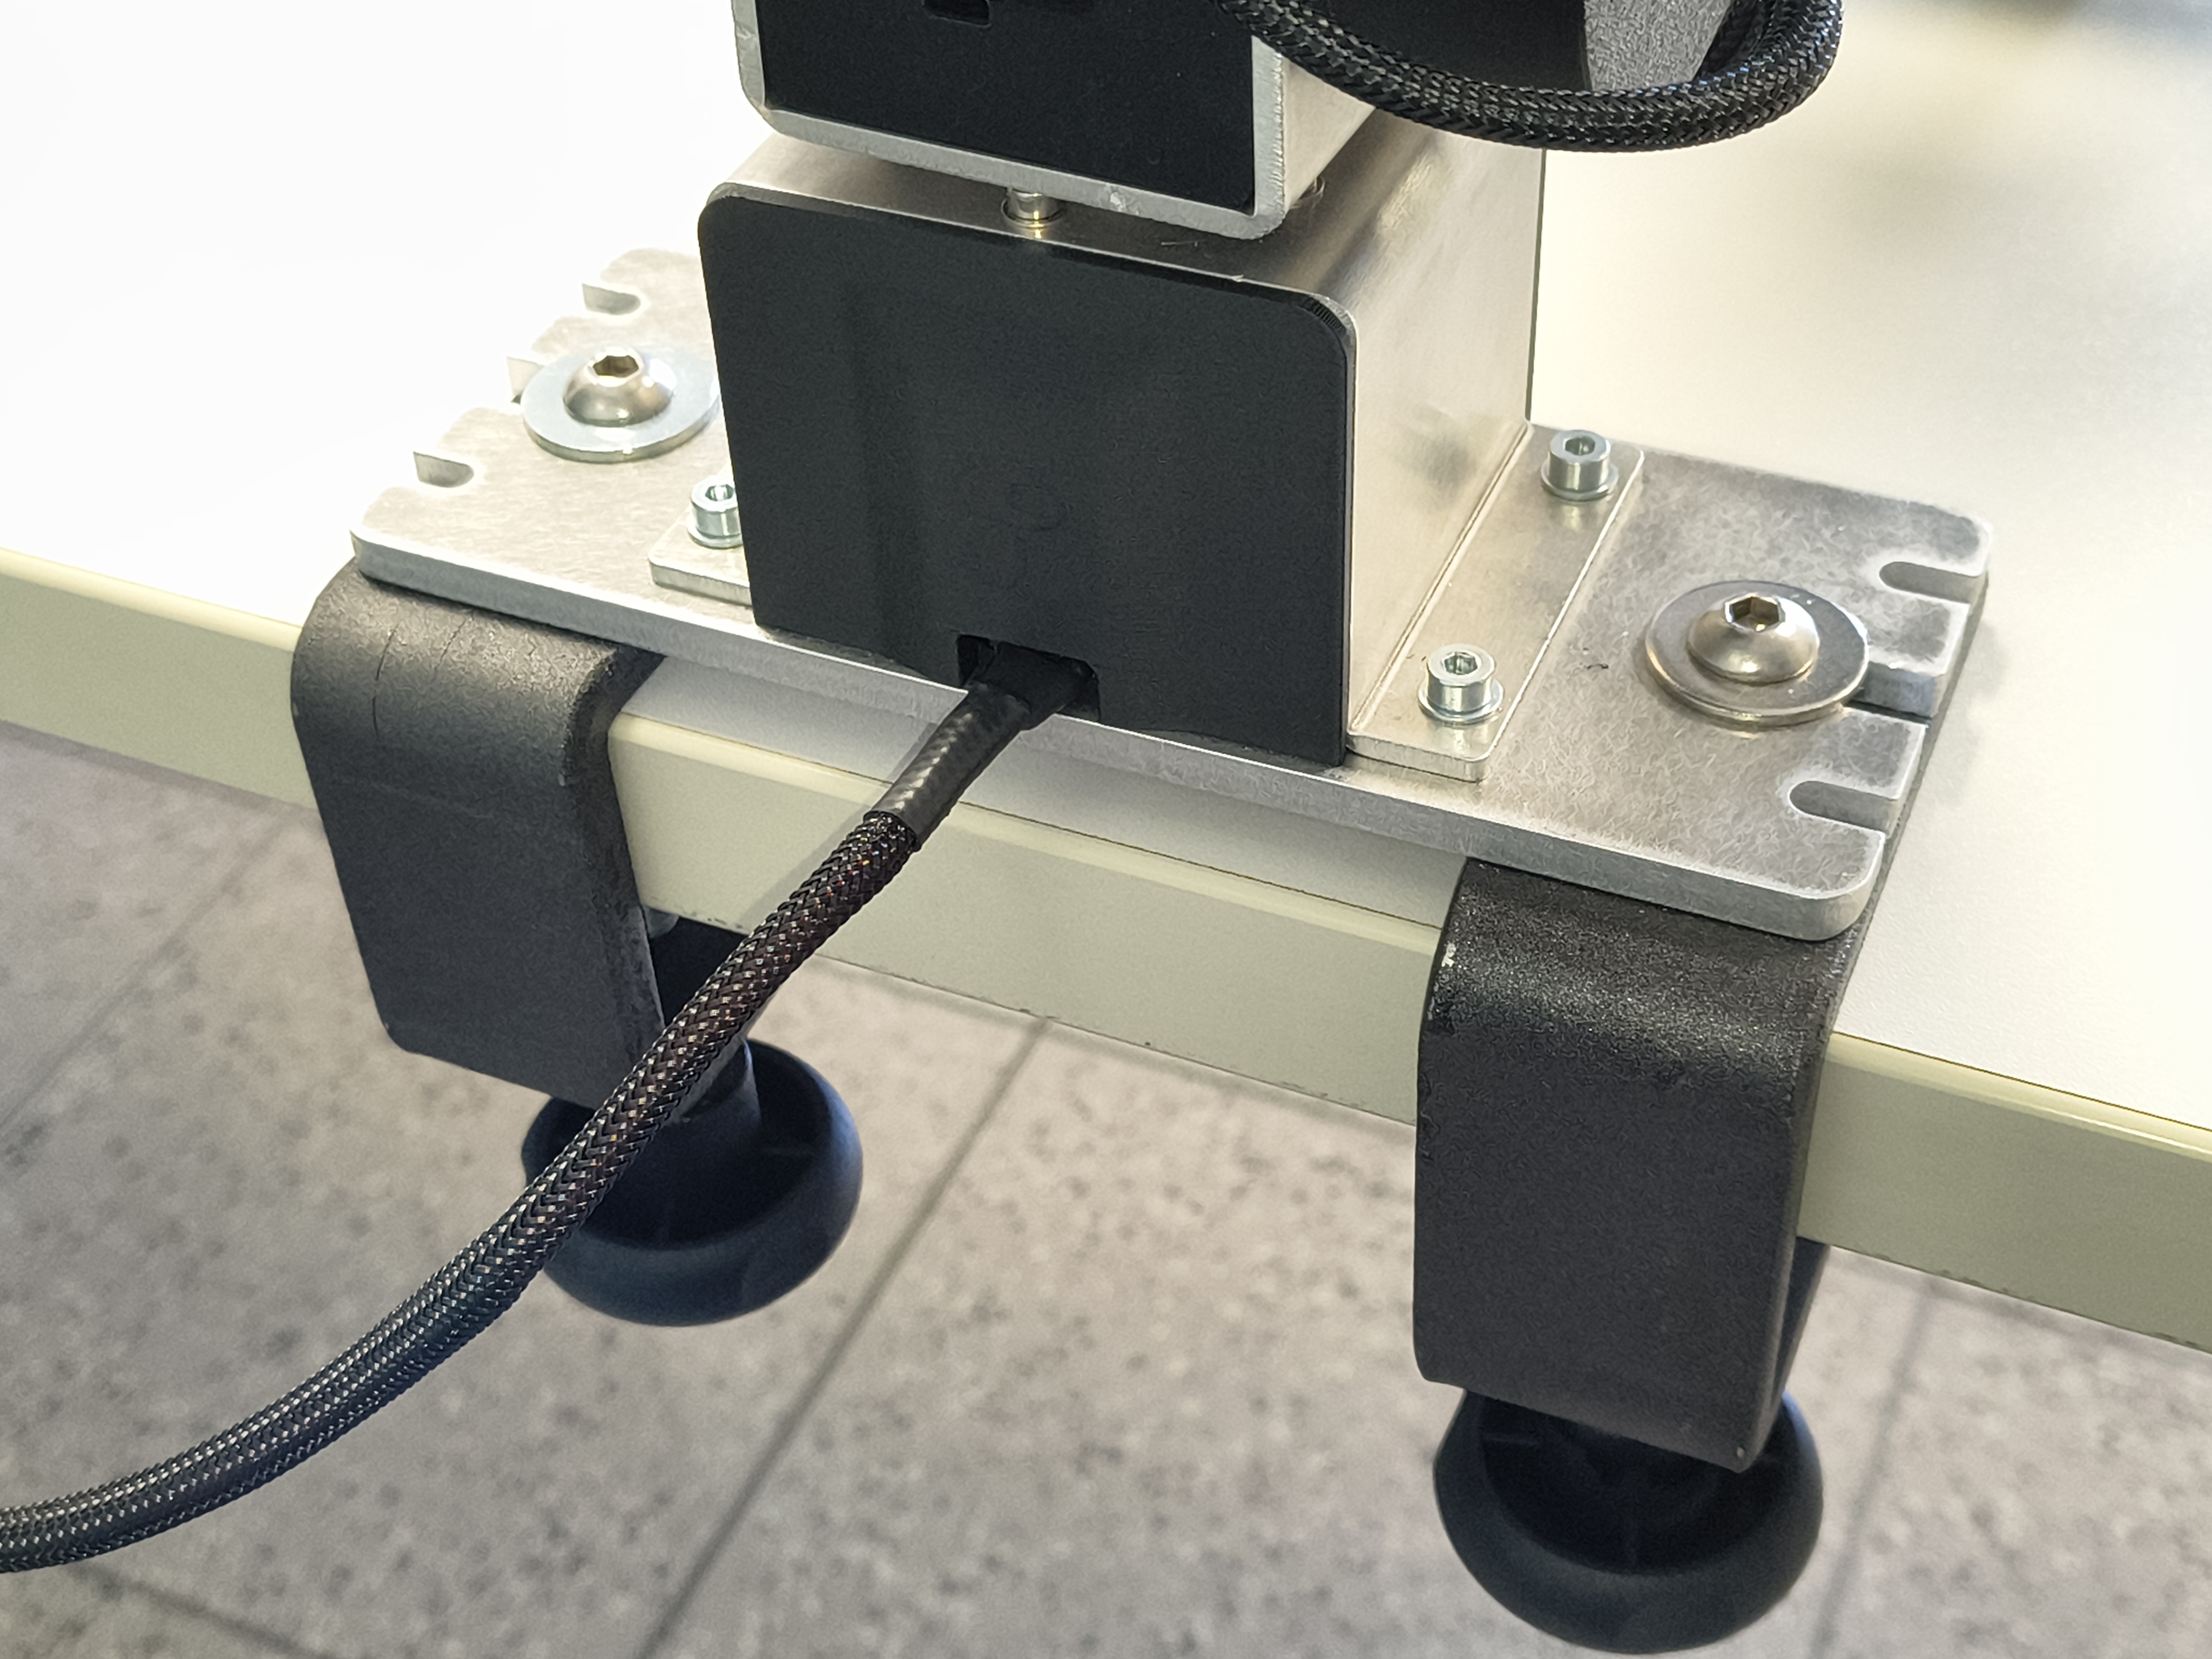
3. Connect the XT30 2+2 Cable to the Robot
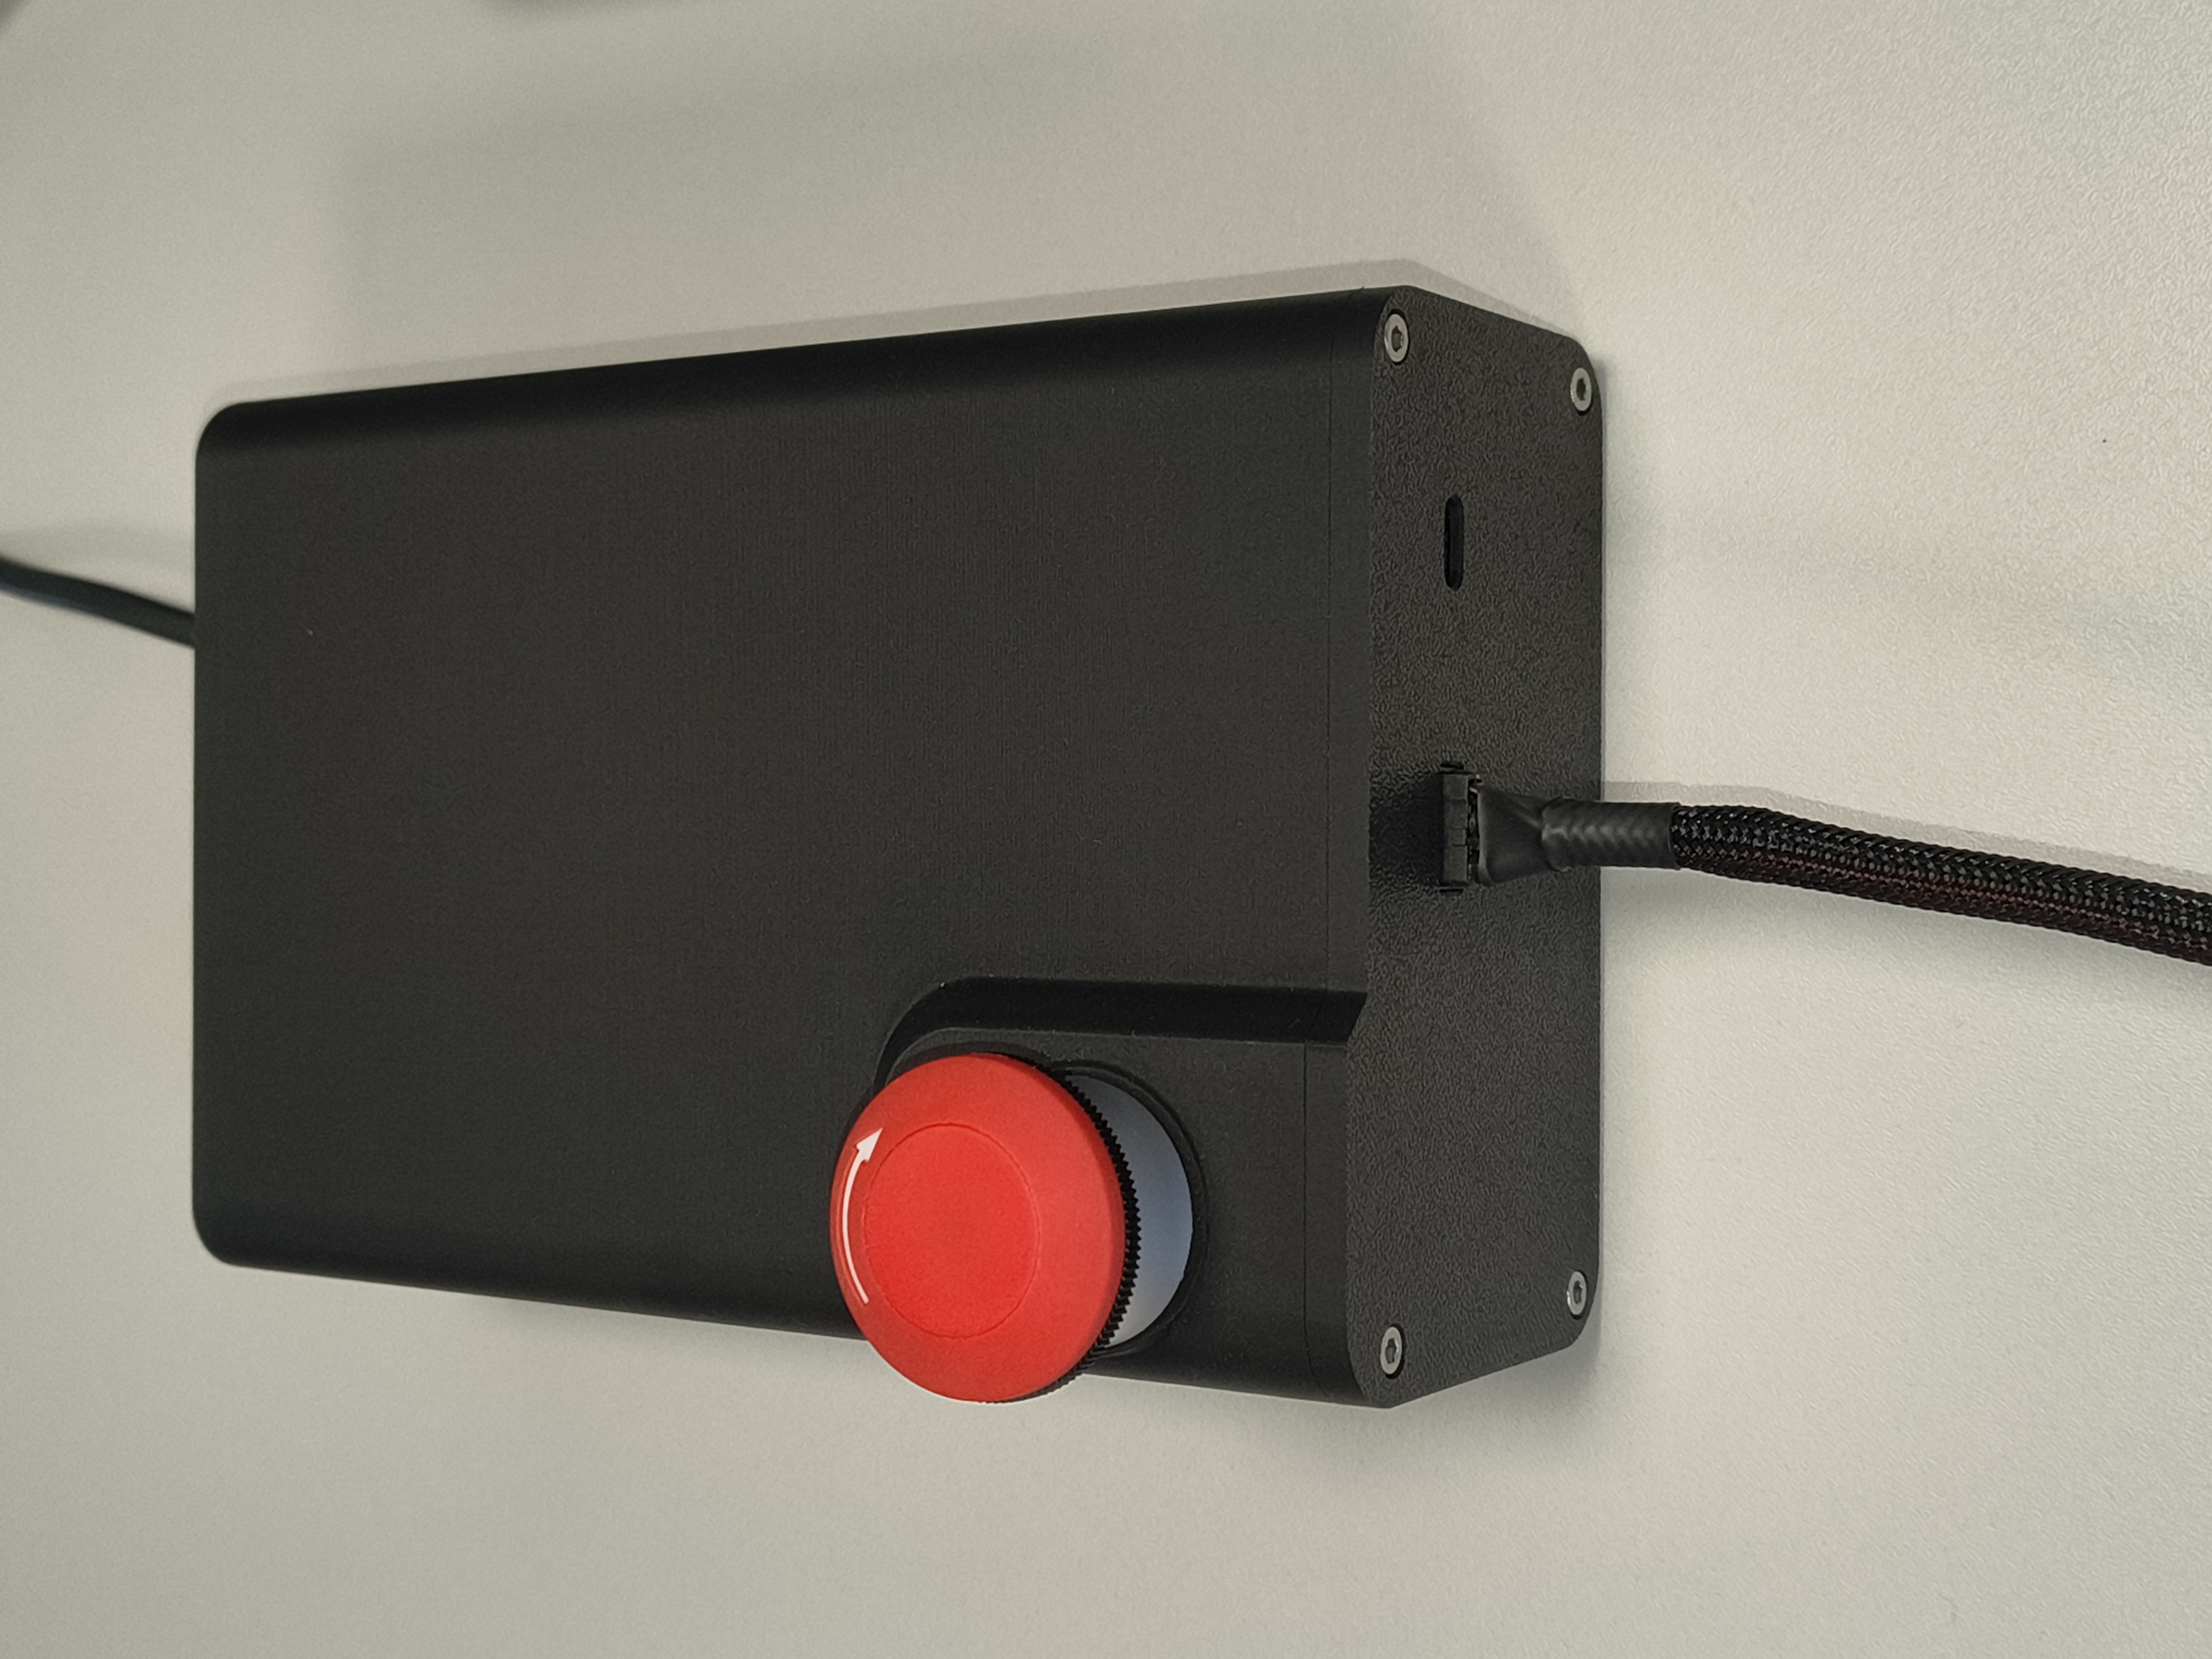
4. Connect the XT30 2+2 Cable to the Power-Brick
Press the emergency button before connecting any cables to prevent unexpected motion during startup.
5. Connect the Power Source
Plug the power cable into the outlet.
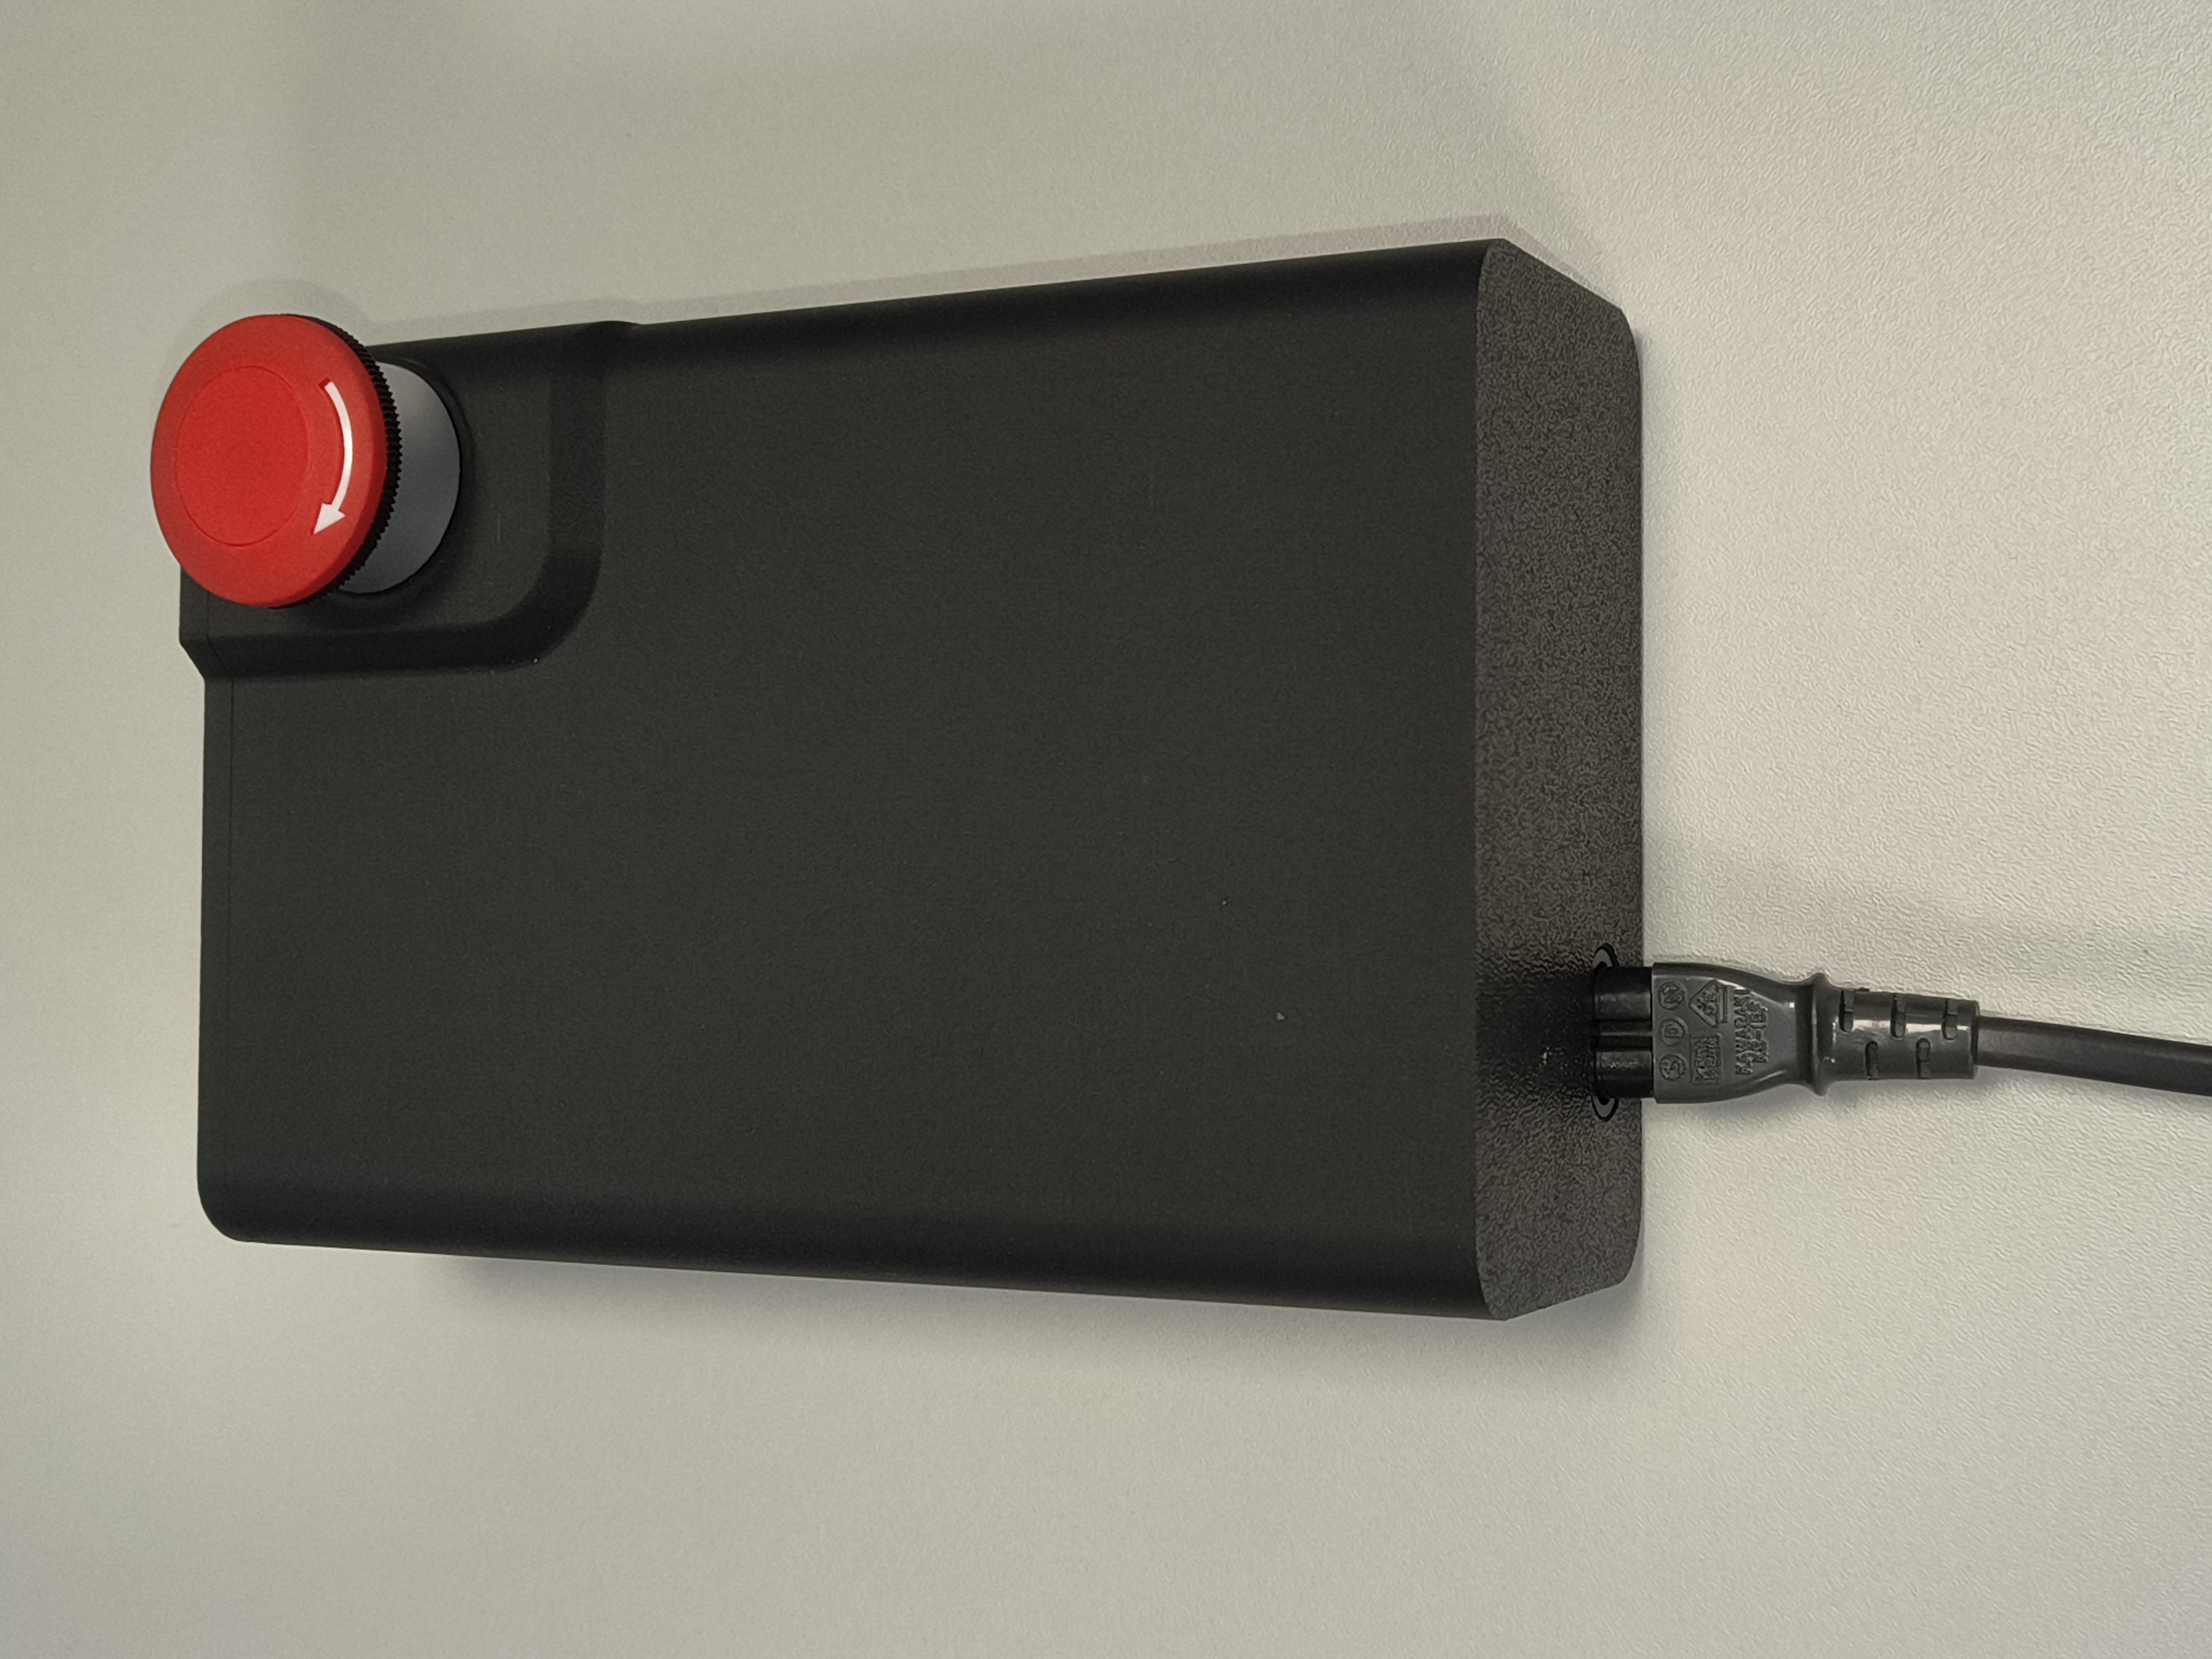
6. Connect the USB-C Cable
Connect the USB-C cable from your machine to the Power-Brick.
Check out the tutorial Connect the COM device to refresh how to connect to the Port.
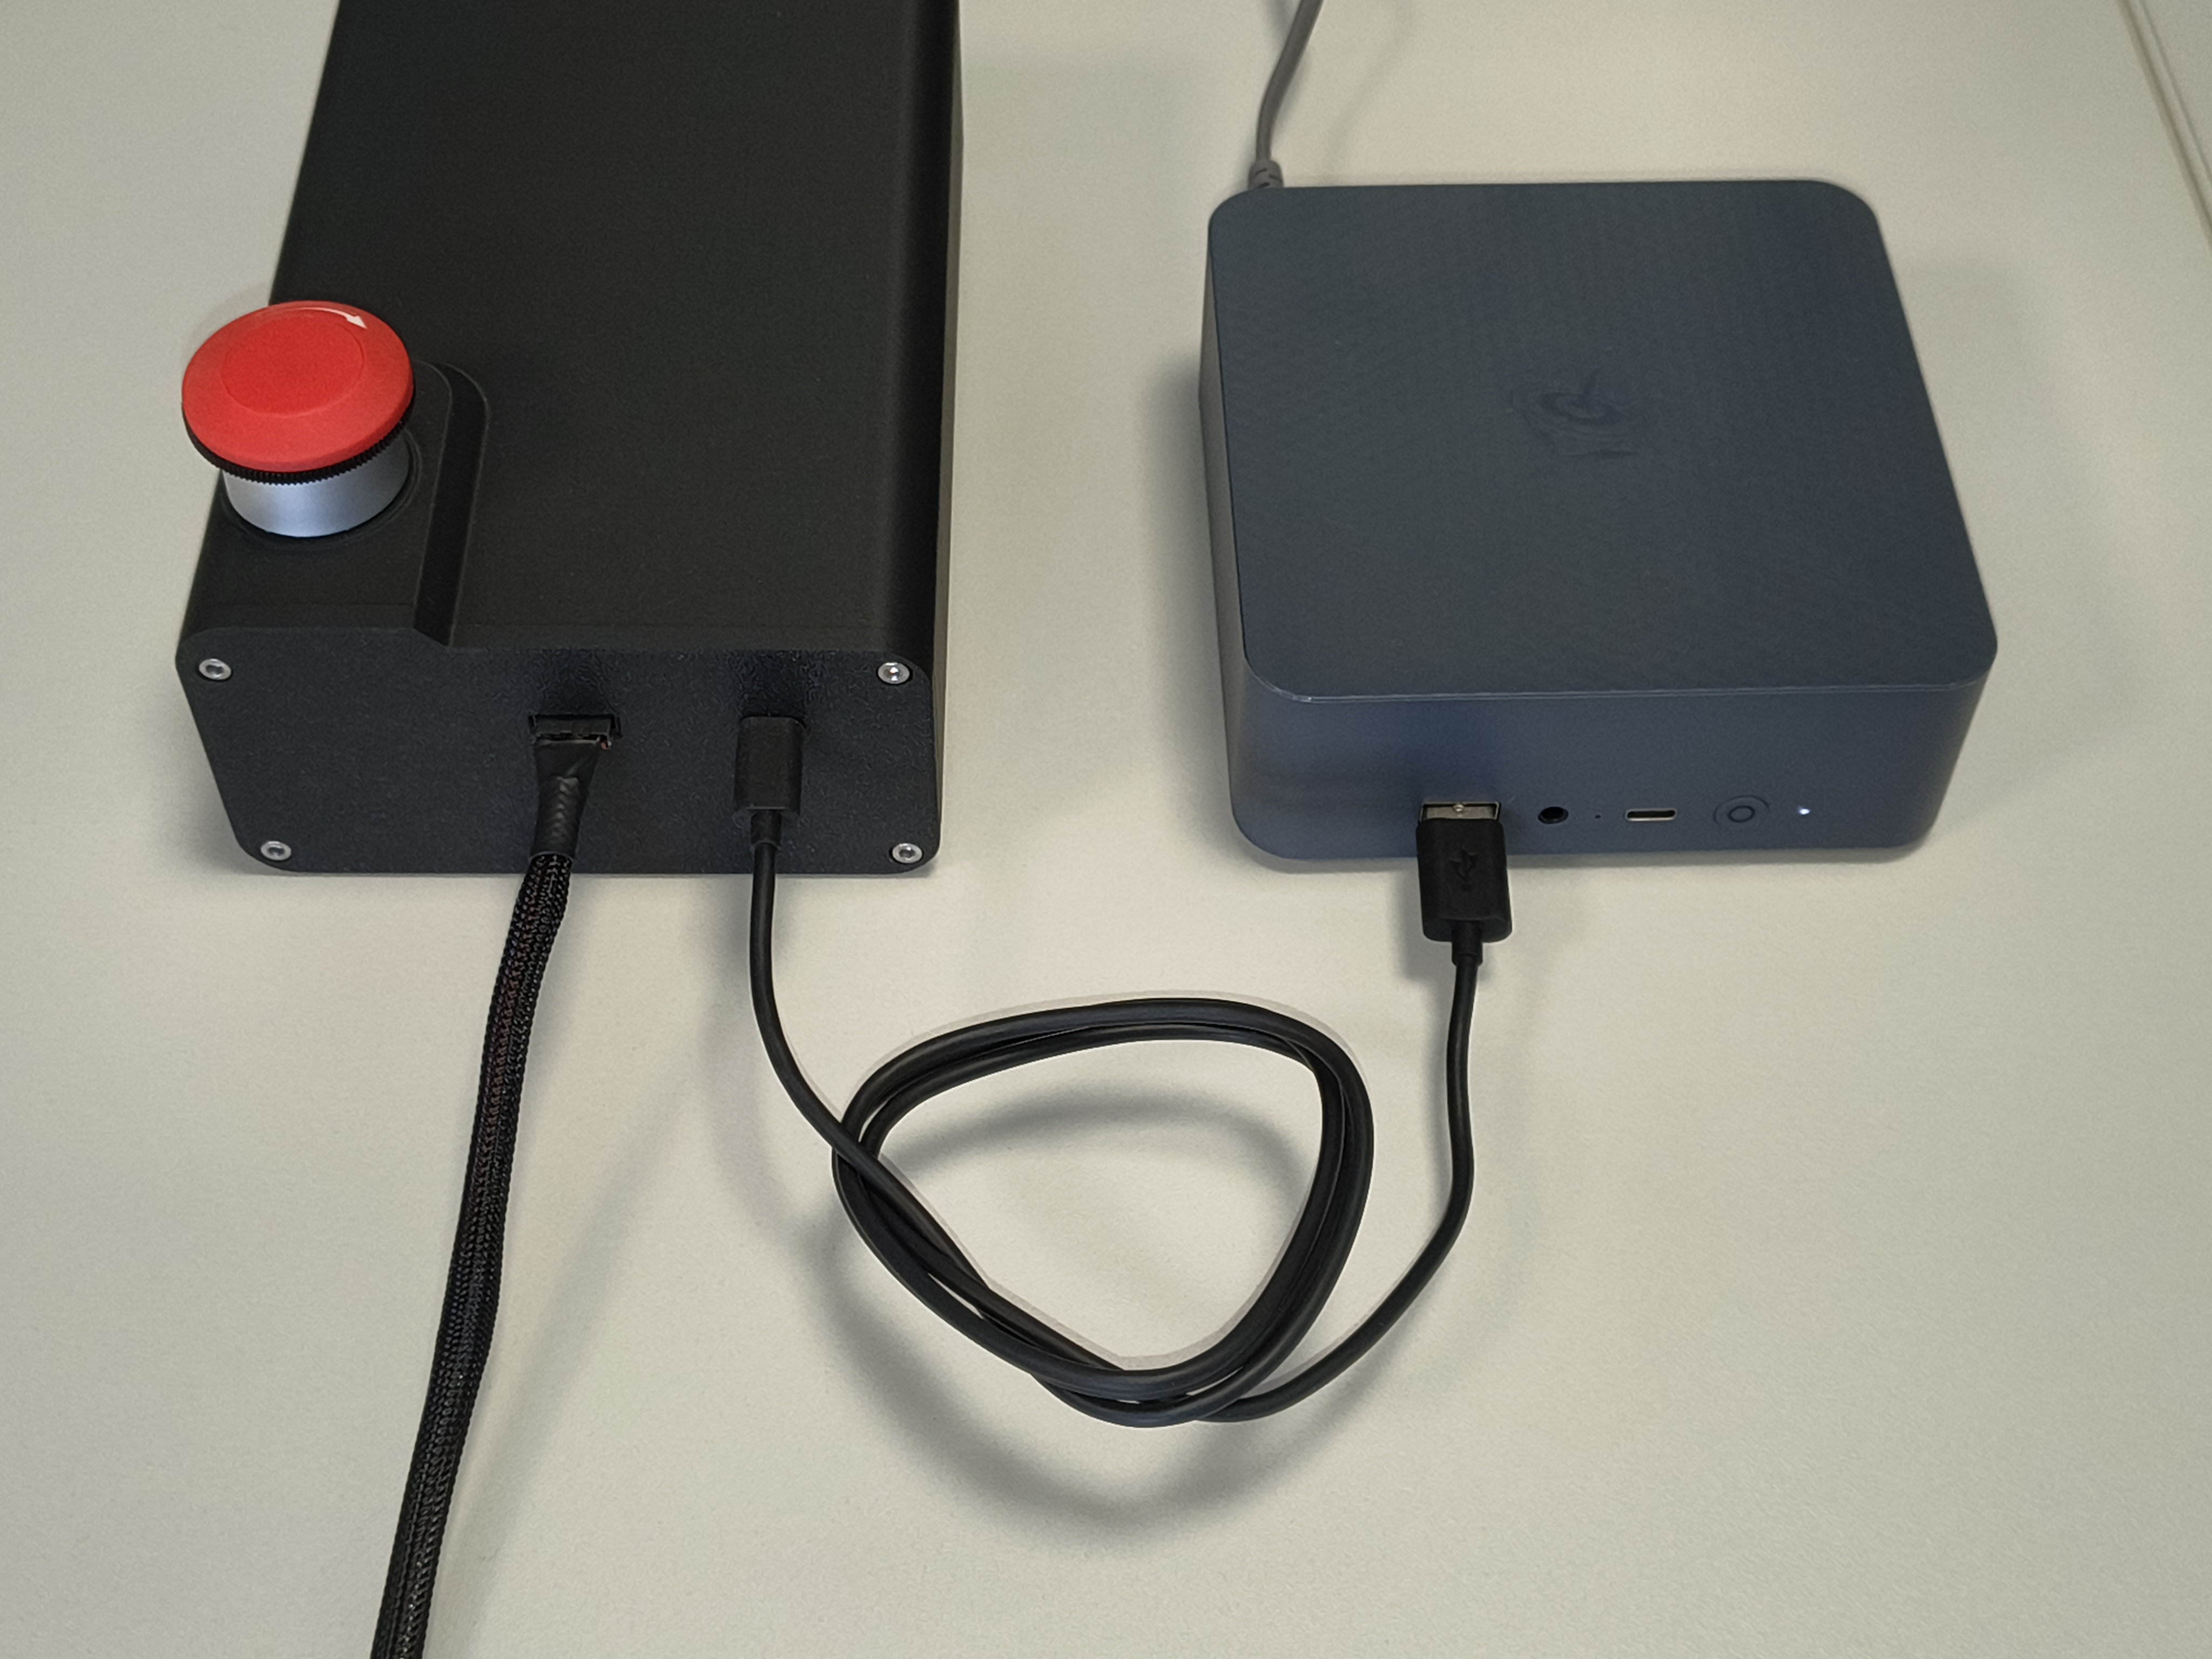
Final Check
At this point your setup should look like this. Make sure to keep the 1 meter distance!
Run the Demo
Before you proceed make sure you follow this checklist
-
usbipdis attached (more info here) - you have cloned the repository
- you have sourced the ROS environment (if not already added to the
.bashrc) - you have build the workspace with colcon
- you have sourced the ulixarm_ros2 workspace (if not already added to the
.bashrc)
Place the Robot
Before launching the demo, place the robot in the following position and rotate the emergency button to release it and enable motor power.
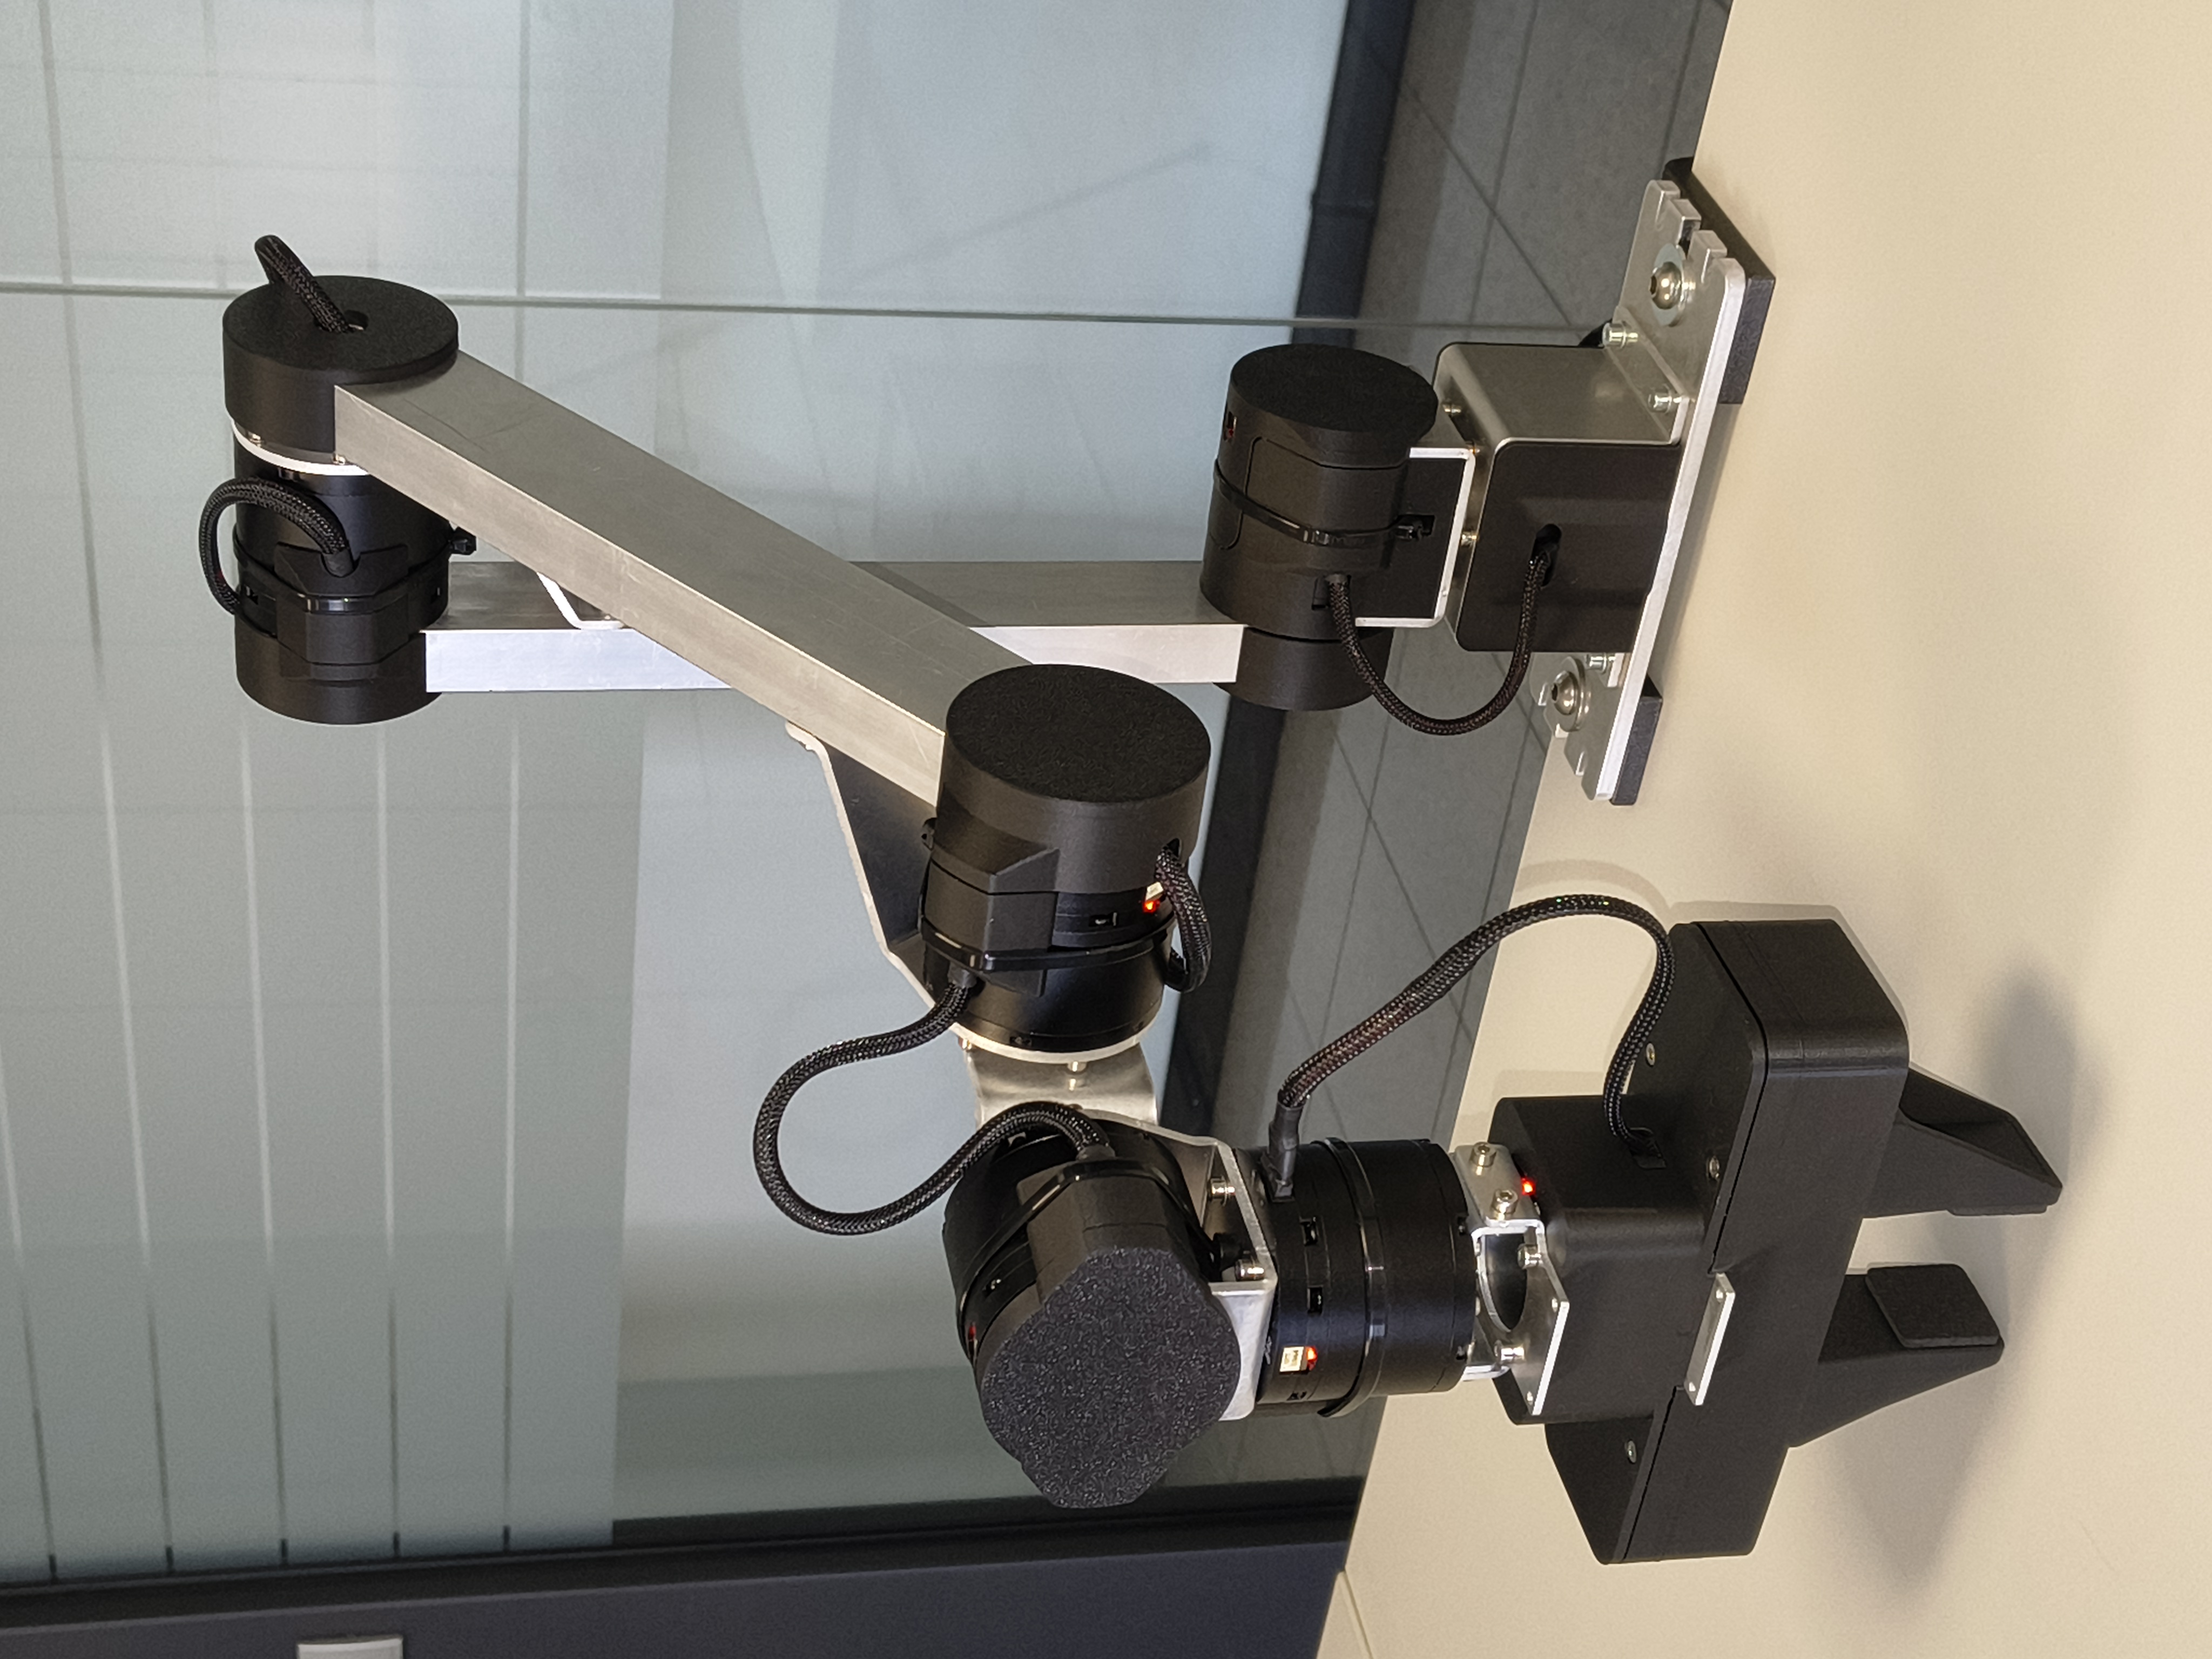
When the robot is powered, a RED LED turns on at each joint. This indicates that the motors are armed, but not ativated yet.
Launch the demo
ros2 launch demos moveit_rviz.launch.py
The LEDs will turn green and RViz will open displaying the robot model in the current position.
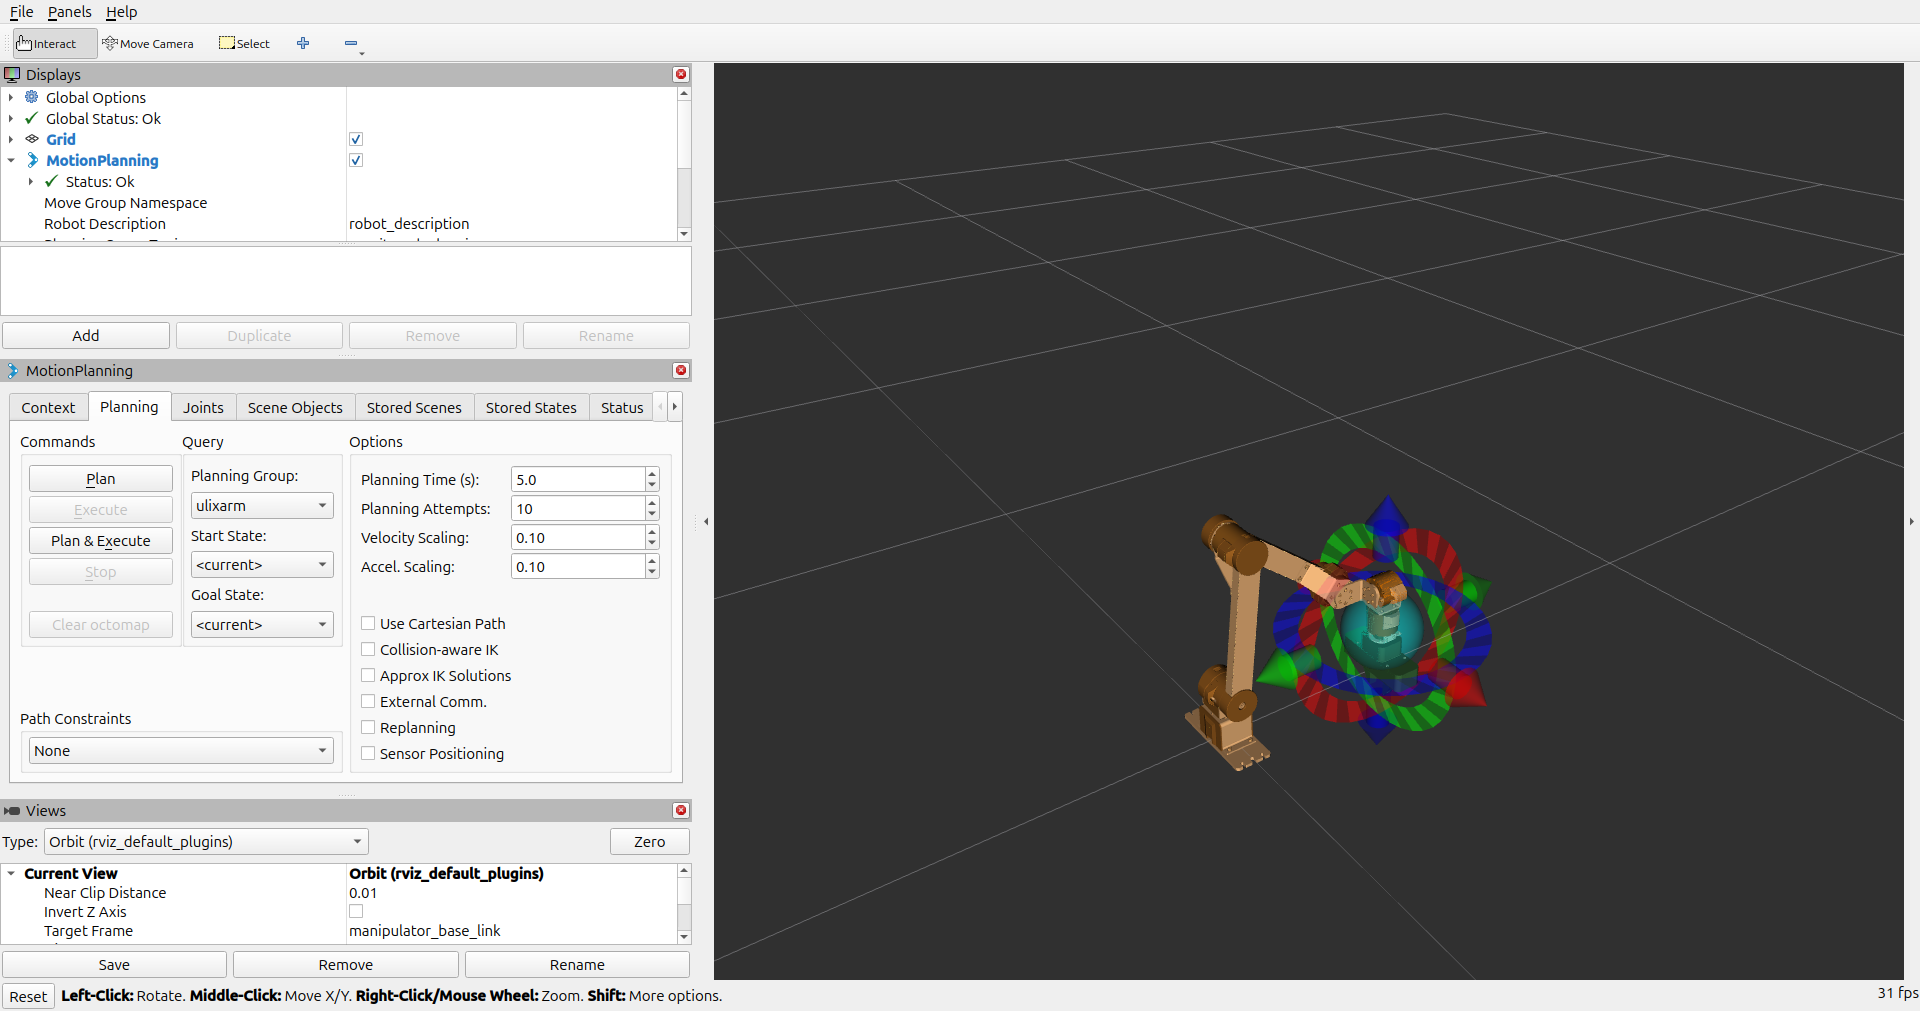
Troubleshooting
If the LEDs are still RED or the position of the robot in RViz is in the zero initialized (straight up) check any errors in the terminal. You might probably find the error: "Failed to open Serial port". In that case check:
- All cables are correctly pluged in
- You have granted permissions to access the serial port (check grant port permissions)
- If you are a Windows user, check if usbipd has been attached to the PowerShell
Planning and Executing Trajectories
You can now plan and execute trajectories from the RViz GUI.
Bring the robot in the ready position
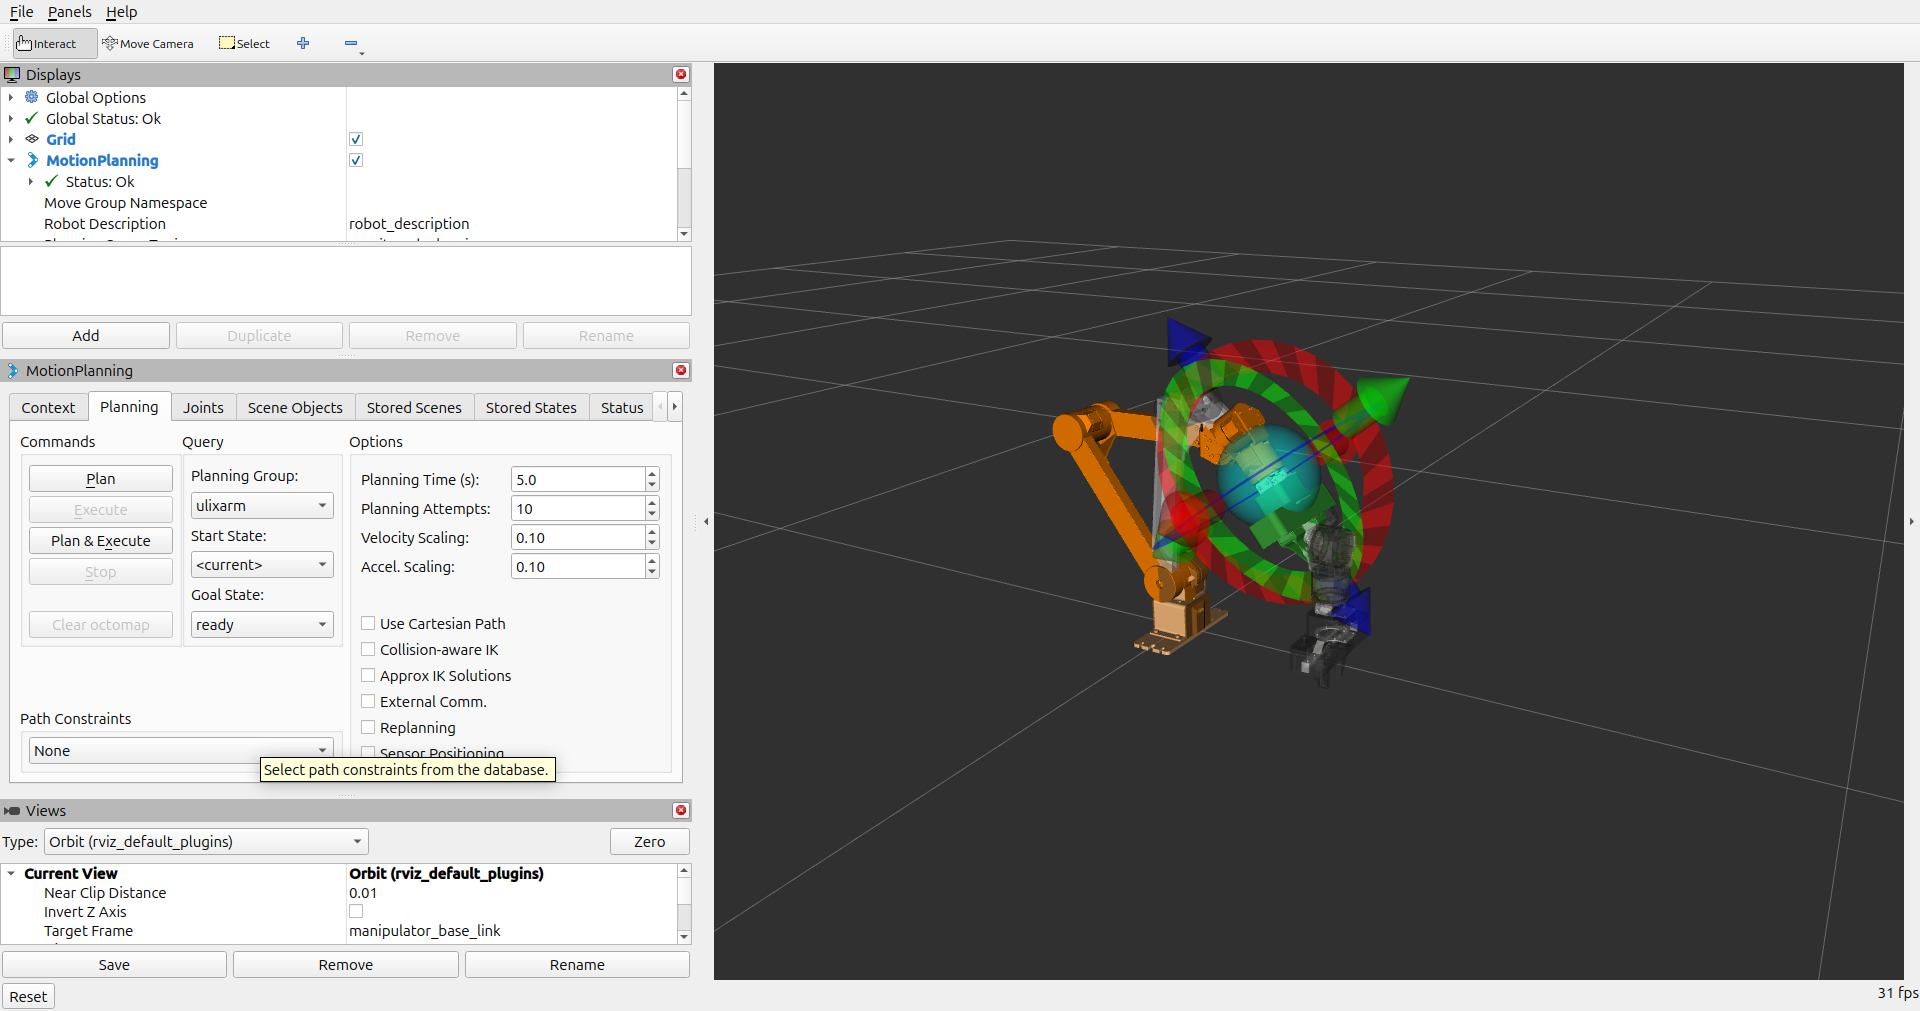
In the MotionPlanning pannel on the left, click on the Goal State: drop-down menu and select the "ready" entry. You will see the orange robot (the goal query) like in the image below. Then click on Plan to plan the movement and afterwards on Execute to send the joint trajectory to the motor controller. The robot will move in the "ready" position.
Plan and Execute a Trajectory
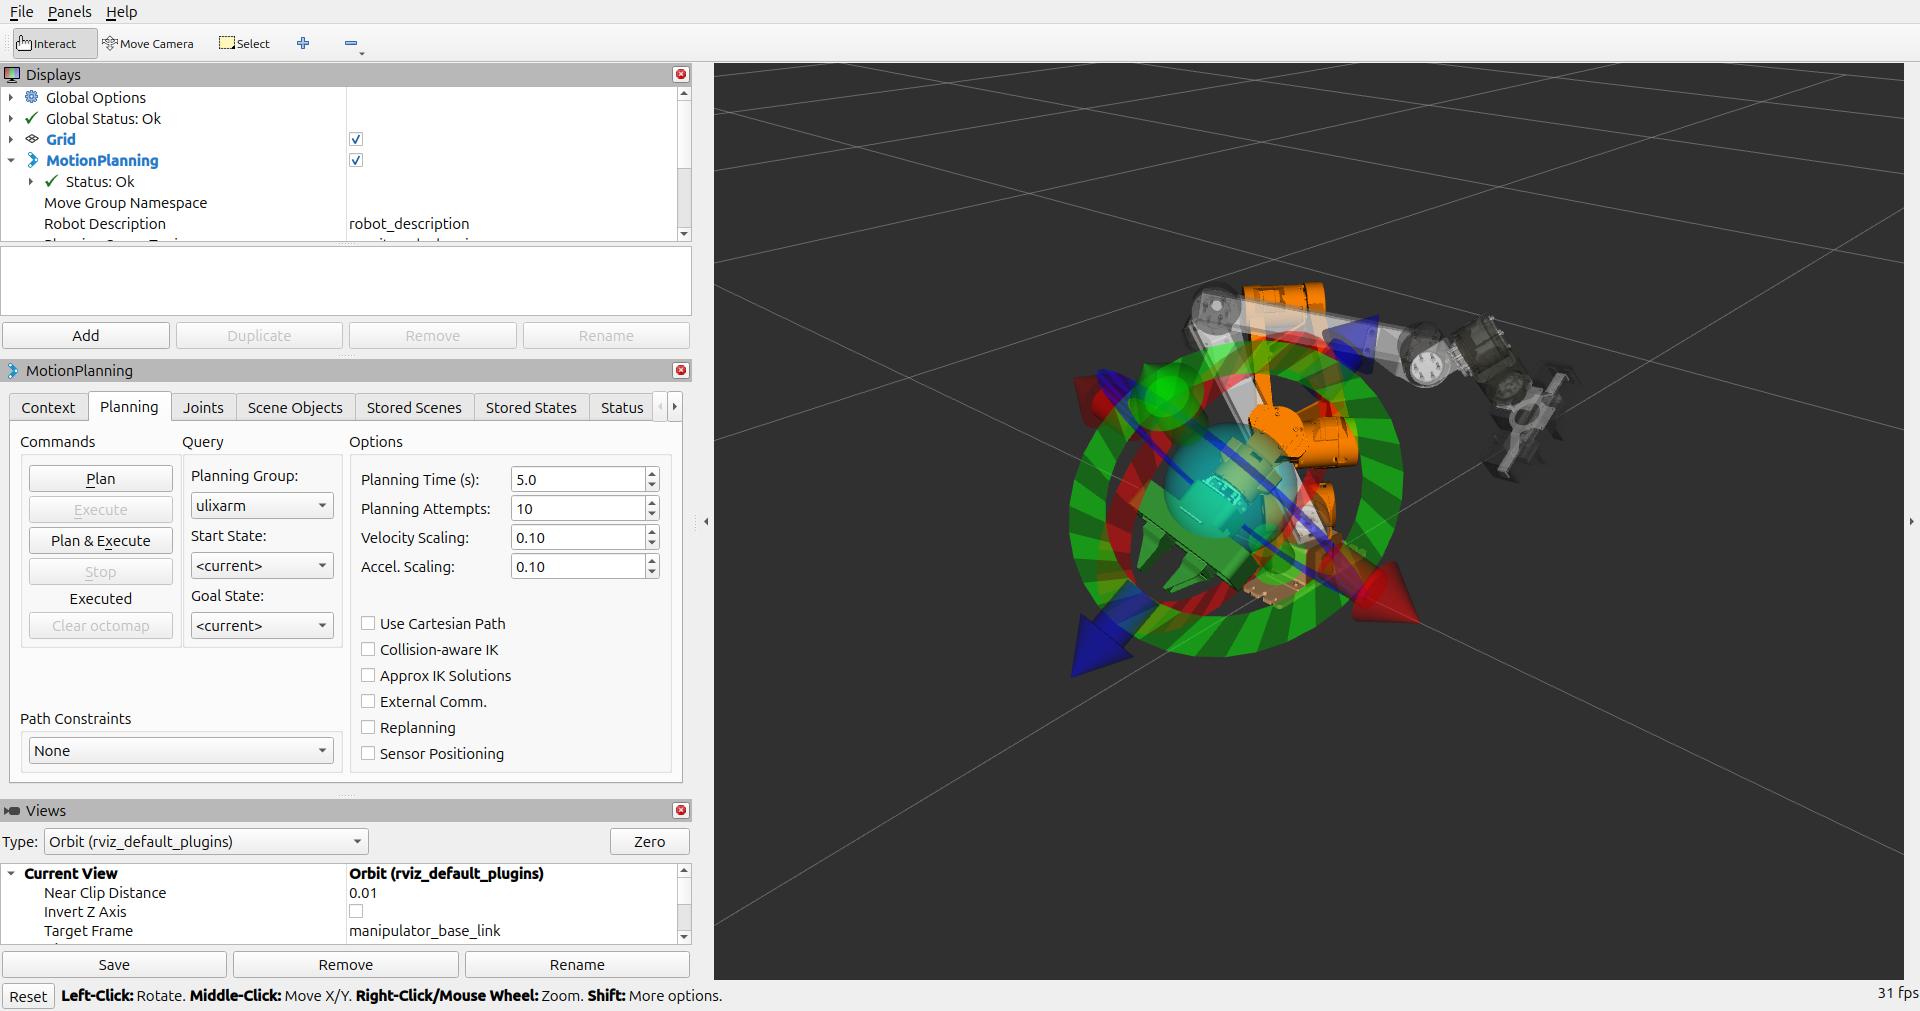
You can now drag and rotate the marker to set a new goal position. Click on Plan and then on Execute to move the robot.
The Pilz Industrial Motion Planner
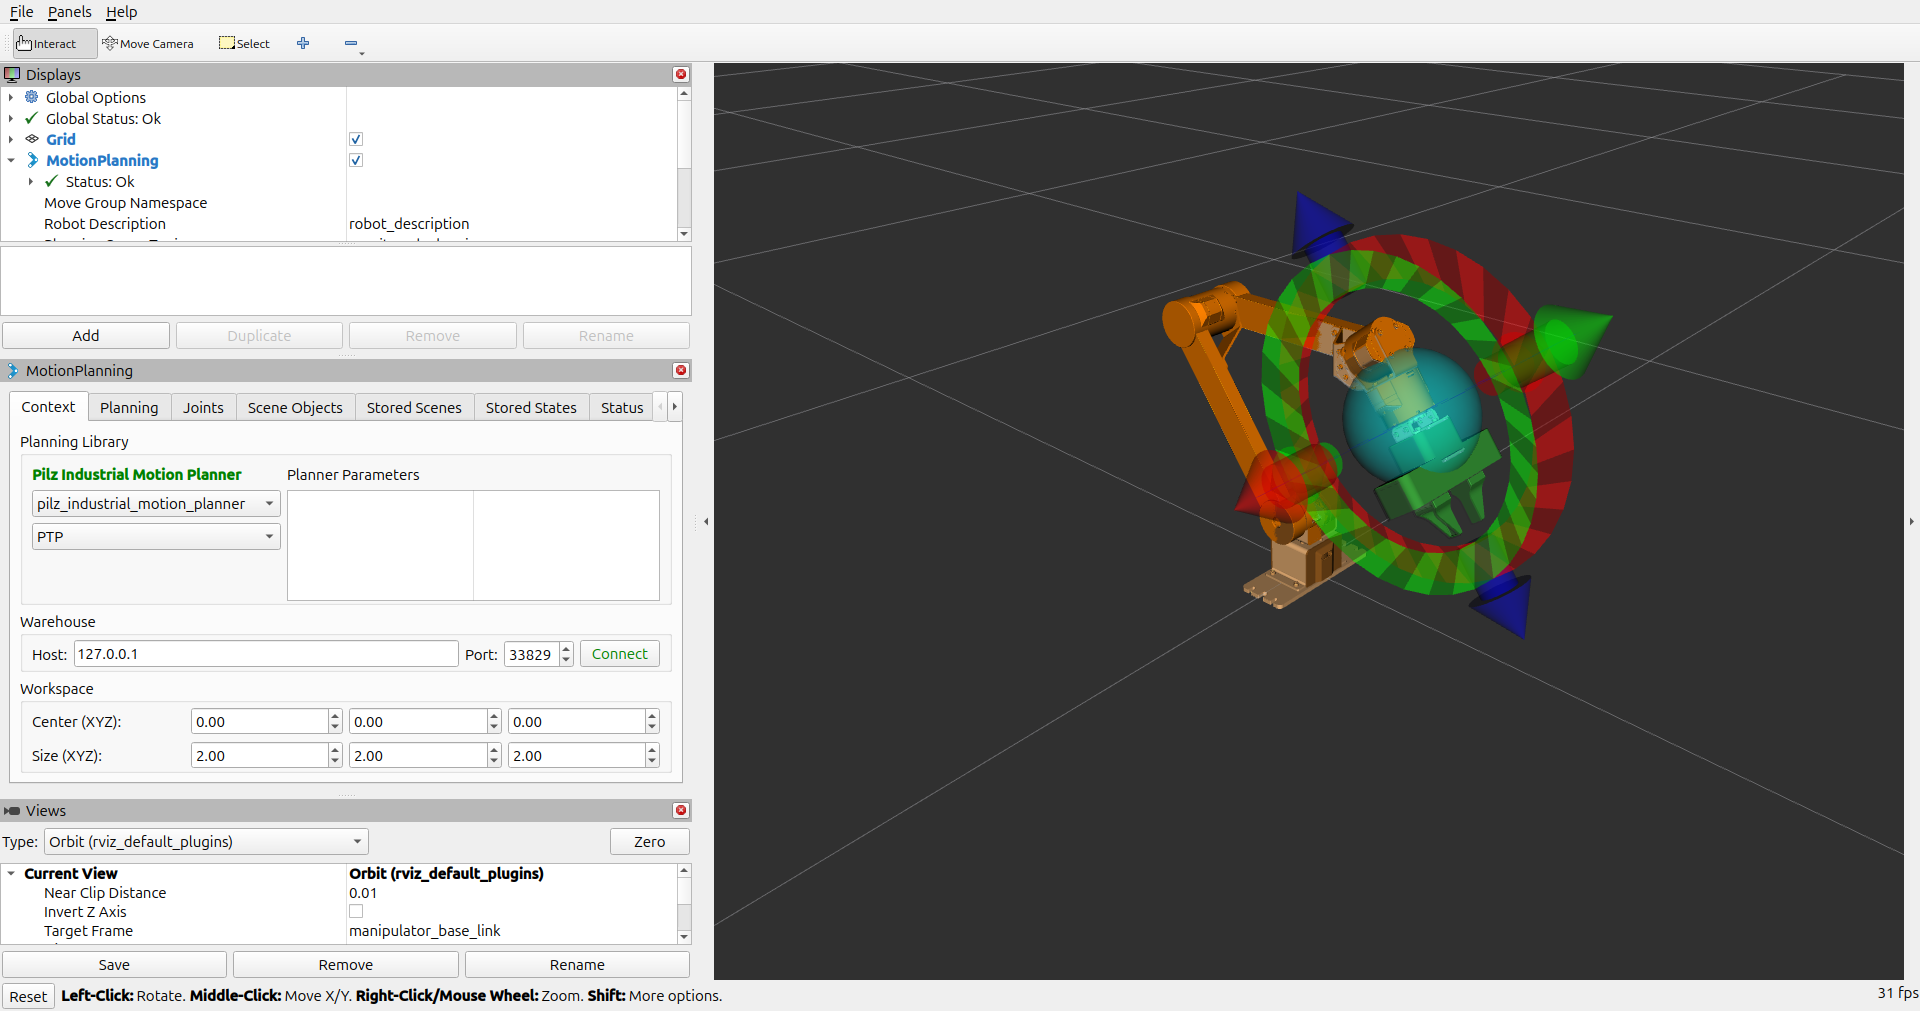
MoveIt 2 supports multiple motion planners. A simple, yet effective, point to point motion planner is the Pilz Industrial Motion Planner. It is not the default motion planner when you start RViz. To set it, click on the Context tab in the MotionPlanning window. Select pilz_industrial_motion_planner and PTP respectively.
Point-to-Point (PTP)
A Point-to-Point trajectory, is a trajectory planned in the joint space. That means that the inverse geometry is computed for the goal position and the trajectory is generated by linearly interpolating (in space, not in time) the start and goal joint angles.
Is the resulting trajectory linear in the task space? Why?
Linear (LIN)
A Linear trajectory, is a trajectory planned in the task space. That means that the start and goal pose of the end-effector are linear interpolated and for each way-point the inverse geometry is computed. The joint trajectory is the set of joint angles for each way-point.
In the Context tab in the MotionPlanning window, select pilz_industrial_motion_planner and LIN respectively.
Is the resulting trajectory linear in the joint space? Why?
Power OFF
When powering off the robot, keep with one hand the robot arm, and with the other one press the emergency button. Otherwise, it will fall down, damaging the mechanical structure.