Getting Started
This tutorial will guide you step-by-step on how to set up the environment and install all dependencies.
Prerequisites
This tutorial assumes you are running on Ubuntu 24.04 LTS (Noble Numbat) on a native Linux machine or on Windows11 with WSL2.
If you are a Windows user, you can simply install the WSL2 by opening PowerShell as an administrator and run the command:
wsl --install Ubuntu-24.04
Follow the directions and you should then see the WSL2 as a stand alone application. Run it and you are good to go!
1. Install ROS 2
The official installation process is available at https://docs.ros.org/en/jazzy/Installation/Ubuntu-Install-Debs.html. Following are the steps summarized to get started.
locale  # check for UTF-8

sudo apt update && sudo apt install locales
sudo locale-gen en_US en_US.UTF-8
sudo update-locale LC_ALL=en_US.UTF-8 LANG=en_US.UTF-8
export LANG=en_US.UTF-8

locale  # verify settings
1.2 Enable the Universe repository
sudo apt install software-properties-common
sudo add-apt-repository universe
1.3 Add the ROS 2 apt repository
sudo apt update && sudo apt install curl -y
export ROS_APT_SOURCE_VERSION=$(curl -s https://api.github.com/repos/ros-infrastructure/ros-apt-source/releases/latest | grep -F "tag_name" | awk -F'"' '{print $4}')
curl -L -o /tmp/ros2-apt-source.deb "https://github.com/ros-infrastructure/ros-apt-source/releases/download/${ROS_APT_SOURCE_VERSION}/ros2-apt-source_${ROS_APT_SOURCE_VERSION}.$(. /etc/os-release && echo ${UBUNTU_CODENAME:-${VERSION_CODENAME}})_all.deb"
sudo dpkg -i /tmp/ros2-apt-source.deb
1.4 Install development tools
sudo apt update && sudo apt install ros-dev-tools
1.5 Update system packages
sudo apt update
sudo apt upgrade
1.6 Install ROS 2 Jazzy Desktop
sudo apt install ros-jazzy-desktop
1.7 Source the environment
Add the ROS 2 setup script to your shell profile so it loads automatically in every new terminal:
echo "source /opt/ros/jazzy/setup.bash" >> ~/.bashrc
source ~/.bashrc
1.8 Verify the installation
You can skip this step, come back to it only if something isn't working as expected.
Open two terminals and run the classic talker–listener demo:
Terminal 1 — C++ talker:
source /opt/ros/jazzy/setup.bash
ros2 run demo_nodes_cpp talker
Terminal 2 — Python listener:
source /opt/ros/jazzy/setup.bash
ros2 run demo_nodes_py listener
You should see the talker publishing messages and the listener printing I heard: [...]. Installation is successful.
2. Install ROS 2 Dependencies
The control pipeline of the robot requires the following packages to be installed.
sudo apt update
sudo apt install -y ros-jazzy-moveit
sudo apt install -y ros-jazzy-pinocchio
sudo apt install -y ros-jazzy-ros2-control
sudo apt install -y ros-jazzy-ros2-control-cmake
sudo apt install -y ros-jazzy-ros2-controllers
sudo apt install -y ros-jazzy-joint-state-publisher
sudo apt install -y ros-jazzy-joint-state-publisher-gui
sudo apt install -y ros-jazzy-robot-state-publisher
3 Connect the COM device
Plug in the USB device to your machine. Next, follow the instructions distinguishing if you are a Linux or Windows user.
4. Linux Users (continue)
Check if the device is visible by running
ls /dev/ttyACM0
You should see the output /dev/ttyACM0
Afterwards, you have to grant permissions to access the serial port. You can either run the first command, but you will have to do so every time you open a new terminal. The second command is permanent and has to be done just once.
sudo chmod 666 /dev/ttyACM0
# Or add your user to the dialout group (permanent):
sudo usermod -aG dialout $USER  # (recommended)
Log out and back in for the group change to take effect.
4. Windows Users with WSL2 (continue)
When using WSL 2, USB devices (including serial/COM ports) are not accessible by default. The usbipd-win tool bridges this gap by forwarding USB devices from Windows into the WSL environment.
4.1 Install usbipd-win in PowerShell (as Administrator)
Open PowerShell as Administrator and run:
winget install --interactive --exact dorssel.usbipd-win
A firewall rule named
usbipdis created automatically, allowing connections on TCP port 3240. If you use a third-party firewall, ensure this port is permitted.
4.2 Install USB/IP tools inside WSL (Ubuntu)
Inside your WSL Ubuntu terminal:
sudo apt update
sudo apt install -y linux-tools-virtual hwdata
sudo update-alternatives --install /usr/local/bin/usbip usbip \
  /usr/lib/linux-tools/*/usbip 20
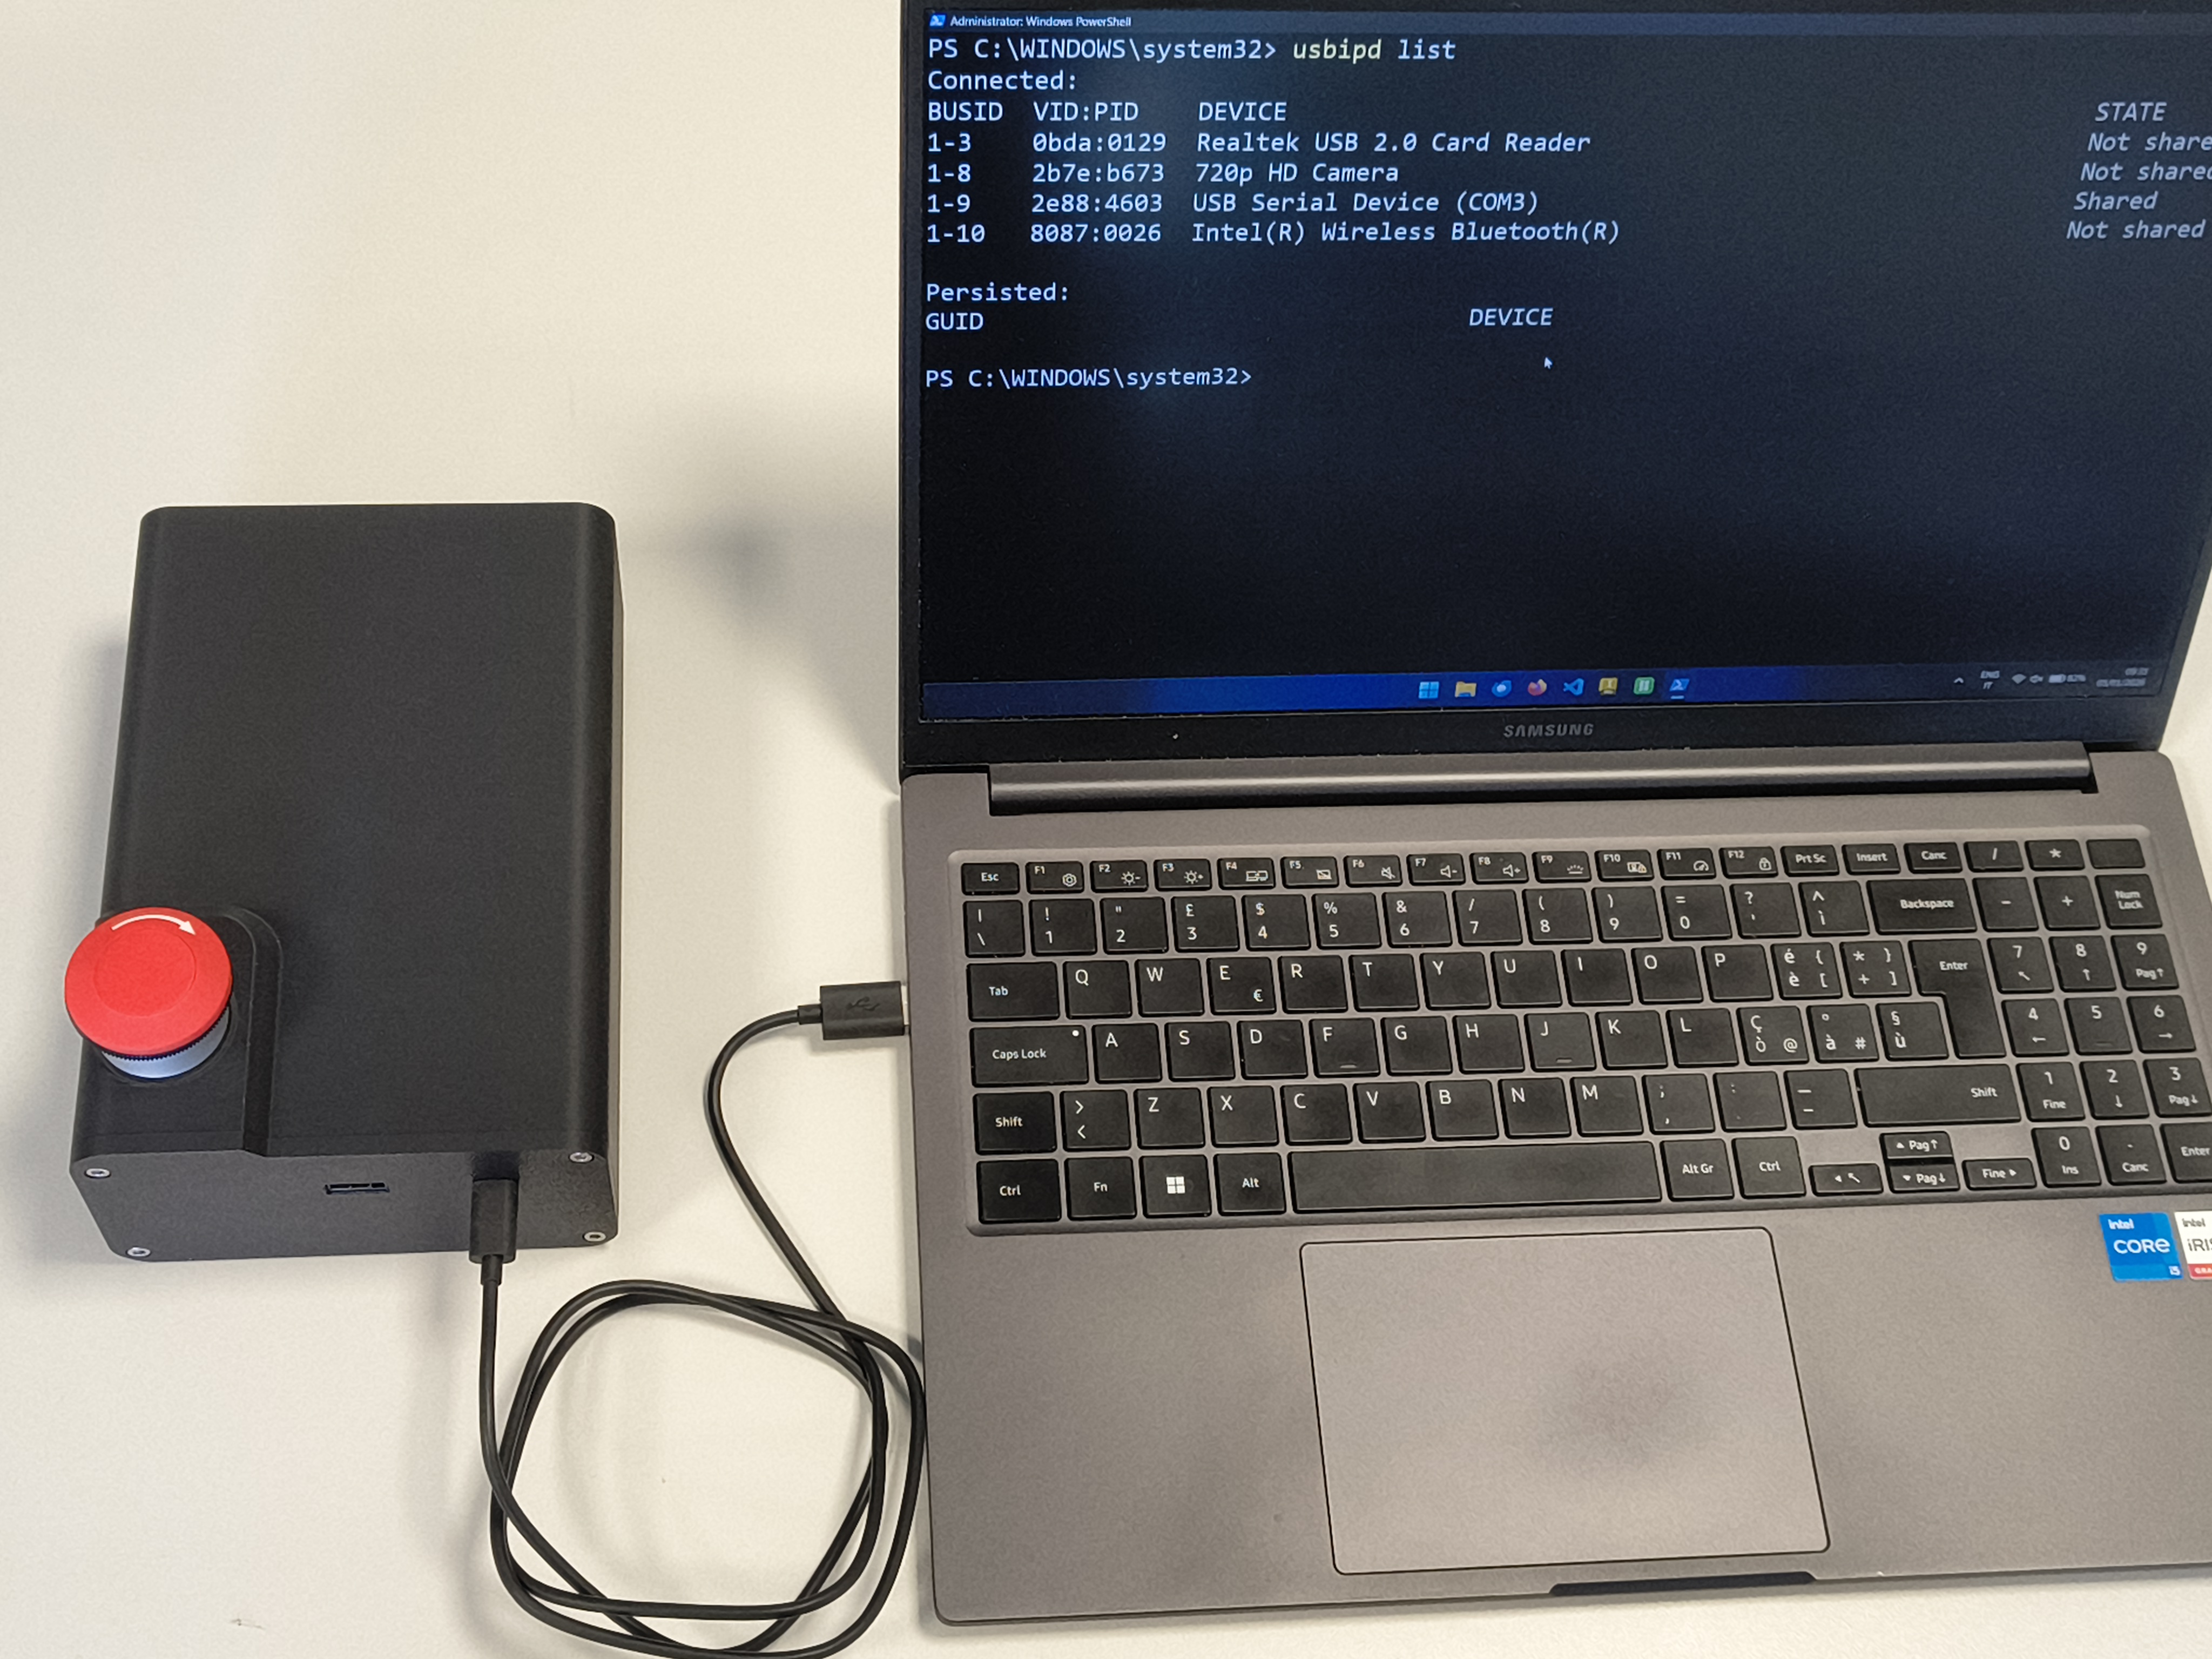
Step 1 — List all connected USB devices
Close and reopen PowerShell as Administrator and run
usbipd list
You will see an output like:
Connected:
BUSID VID:PID     DEVICE                          STATE
1-3   0bda:0129   Realtek USB 2.0 Card Reader     Not shared
1-8   2b7e:b673   720p HD Camera                  Not shared
1-9   2e88:4603   USB Serial Device (COM3)        Not shared    <-- THIS
1-10  8087:0026   Intel(R) Wireless Bluetooth(R)  Not shared
Find the COM device USB Serial Device (COM3) and note its BUSID.
Step 2 — Bind (share) the device
In the same PowerShell session with Administrator rights run
usbipd bind --busid <BUSID>
# Example:
usbipd bind --busid 1-9
Binding is persistent — you only need to do this once per device, even after reboots.
Step 3 — Open the WSL
Open the WSL2 application, which you installed before. You can find it in your apps by clicking the ⊞ Win key and typing "WSL". This step is important to attach the device to the WSL.
Step 4 — Attach the device to WSL
In PowerShell run the following command to bind the port to the WSL.
This step has do be done every time the USB port is connected.
usbipd attach --wsl --busid <BUSID>
# Example:
usbipd attach --wsl --busid 1-9
Step 5 — Verify inside WSL
ls /dev/ttyACM0
If it works you will see /dev/ttyACM0.
Step 6 — Grant serial port permissions (WSL)
You have to grant permissions to access the serial port. You can either run the first command, but you will have to do so every time you open a new terminal. The second command is permanent and has to be done just once.
sudo chmod 666 /dev/ttyACM0
# Or add your user to the dialout group (permanent):
sudo usermod -aG dialout $USER  # (recommended)
Log out and back in (or restart WSL) for the group change to take effect.
4.4 Detach the device when done (PowerShell)
usbipd detach --busid <BUSID>
After a reboot or if the device is replugged, you must run
usbipd attachagain. Thebindstep does not need to be repeated.
4.5 Auto-attach on reconnect (optional)
usbipd attach --wsl --busid <BUSID> --auto-attach
This keeps the device attached to WSL and automatically re-attaches if it resets or is replugged.